
How to Transfer Data from Nokia C02 to Any iOS Devices | Dr.fone
How to Transfer Data from Nokia C02 to Any iOS Devices

If you are a proud owner of smartphones running on two different operating systems such as Windows and iOS, you might face the challenging task of transferring the data from your Windows phone to iPhone. Transferring the data between the two devices running the OS of the different platforms is not as easy as it is when you have devices with a common platform. This article aims to guide you through two simple routes that you can follow to transfer the data stored in your Windows phone such as Nokia C02 to iPhone or other iOS devices. You don’t need to worry about how to transfer from Nokia C02 to iPhone or How to transfer contacts from Nokia C02 to iPhone anymore after reading this article. Read them on.
- 1. You can rely on some program/online service/website such as Outlook, CSV file format, Google Contacts, etc.
- 2. You may experience issues while transferring data from your Nokia C02 phone to iPhone.

Part 1: Transfer Data Wirelessly via Microsoft ID
Windows phones such as Nokia C02 depend on a Microsoft ID to back up your important data such as contacts, text messages, calendar, and device preferences. Once you have configured the data on your Nokia C02 smartphone, you can add the same Microsoft email address to your iPhone and then sync the data to it. Given below are the step-by-step instructions on how to transfer from Nokia C02 to iPhone via Microsoft ID:
Step 1: Make an account on Outlook.com.
1. Open www.outlook.com on the web browser on your smartphone or PC.
2. Once you are redirected to the website, tap the “Sign up” option from the top-right corner.
3. Enter the required information in the available fields to create an account.
Step 2: Sync the data on your Nokia C02 to Microsoft’s Outlook.com account.
1. Switch on your Nokia C02 smartphone.
2. Scroll through the Home screen to find the “Settings” option.
3. Once located, tap the “Settings” option to open it.
4. On the “Settings” window, locate and tap the “email+accounts” option to open it.
5. From the opened window, tap the “add an account” option.
6. After the “ADD AN ACCOUNT” window opens, tap “Outlook.com” from the available options.
7. Tap the connect button from the bottom-left corner of the OUTLOOK.COM window.
8. Once you are redirected to the outlook.com website, in the available fields, enter the credentials of your Microsoft account that you created earlier.
9. Tap the “Log in” button when done.
10. Wait till the data on your Nokia C02 automatically gets synchronized with your Outlook account.
Step 3: Import the data from your Outlook account to the iPhone.
1. Switch on your iPhone and scroll through the Home screen to locate the “Settings” option.
Note: Make sure your device is connected to the Internet.
2. Once located, tap to launch the “Settings” app.
3. On the opened “Settings” window, tap the “Mail, Contacts, Calendars” option.
4. After the “Mail, Contacts, Calendars” window opens, tap the “Add Account” Add Account option under the “ACCOUNTS” section.
5. From the available options, tap “Step two”Outlook.com.
6. Once the “Outlook” window opens, enter your Outlook account credentials, and tap “Next” from the top-right corner.
7. Wait till your device verifies your account.
8. Once your account details are verified and a list of transferrable data types is displayed on the screen, tap to slide the switch to the right for the data that you want to import.
Note: After you slide the switch to transfer the Contacts, iPhone provides you with an option to keep the contacts that are already stored in your device or delete them altogether before importing the new ones from your Outlook account. You can choose any option as per your requirement.
9. Once you have selected the data that you want to import, tap the “Save” button from the top-right corner.
10. Wait till the data gets imported to your iPhone.
Pros:
- You can transfer your data for free using this method and the only requirement is Internet connectivity.
- You are saved from downloading a third-party application to transfer your data.
- You can easily transfer the data wirelessly without the need to make your PC as a go-between
Cons:
- It is a time-consuming process.
- You cannot transfer photos and media files by following this method.
Part 2: Transfer Data Using PhoneCopy
With PhoneCopy you can easily export data from your Nokia C02 to the PhoneCopy server, and then import the data from the PhoneCopy server to your new iOS device. It is easy to transfer contacts from Nokia C02 to iPhone with PhoneCopy. What you need is PhoneCopy iPhone Nokia C02.
In order to do so, you need:
A registered PhoneCopy account.
1. On your computer, open any web browser of your choice and go to https://www.phonecopy.com/en/ .
Note: Make sure your device is connected to the Internet.
2. From the right section of the opened web page, click “REGISTER NOW.”
3. On the “REGISTRATION” page, populate the available fields with the correct values and click “CONTINUE” from the bottom.
4. Follow the on-screen instructions thereafter to complete the account creation process.
Note: You may need to activate your account using the confirmation mail that you would receive while completing the account creation process.
The PhoneCopy app on your Windows phone.
1. Power on your Nokia C02 smartphone.
Note: Make sure that the phone is connected to the Internet.
2. From the Home screen, locate and tap the Store icon to open the Windows App Store.
Note: You must use your Microsoft account to sign in to Windows Store before the phone allows you to download the apps.
3. Once you are on the “store” interface, search for and tap the “PhoneCopy” app
4. On the next window that appears, tap “Install” pato install PhoneCopy on your Windows phone.
After you have successfully installed PhoneCopy on your Nokia C02, it is now time to export all your contacts to the PhoneCopy server. You can do so by following the steps given below:
Step 1: Export data to the PhoneCopy server.
1. On your Windows phone, locate and tap to launch the “PhoneCopy” app.
2. On the displayed interface, in the available fields provide your PhoneCopy account credentials (username and password) that you used to create your PhoneCopy account earlier.
3. Once done, tap the”Export to phonecopy.com” button and wait till all your contacts are exported to the PhoneCopy server.
Step 2: Import data to the iPhone from the PhoneCopy server.
1. Power on your iPhone.
Note: Make sure that your phone is connected to the Internet.
2. From the Home screen, locate and tap the Apple App Store icon.
Note: Ensure that you are signed in to the App Store using your Apple ID.
3. Search for, locate, download, and install the “PhoneCopy” app on your iPhone
4. Once installed, tap the “PhoneCopy” icon on your iOS device to launch the program.
5. When asked for, provide the same PhoneCopy credentials that you used to export the data from your Nokia C02 phone in the previous step.
6. After you are signed in to your PhoneCopy account on your iPhone, click the “Synchronize” button to import all the data from the PhoneCopy server to your new iPhone.
Although PhoneCopy does a great job when it comes to transferring data between the phones from different platforms, the app comes with a few pros and cons which include:
Pros:
Registering and using PhoneCopy is free.
PhoneCopy can back up your calendar events, SMS, tasks, and notes and can help you import them on a different phone (typically on iPhone).
Cons:
Only up to 500 contacts, SMS, tasks, and notes can be synched while using the Basic version (free account) of PhoneCopy. To remove this restriction, you must buy the Premium version for which PhoneCopy charges $25 annually.
The archived data is auto-deleted from the PhoneCopy server after one month when using the Basic version, and after 1 year when using the Premium version.
Bonus Tip: Best Way to Transfer data between Android and iPhone
Dr.Fone - Phone Transfer lets you transfer data from Nokia C02 to iPhone or iPhone to Android in 1 Click. It supports almost all mobiles, including iPhone, Android Samsung, LG, Sony, HTC, etc. Dr.Fone - Phone Transfer can transfer music, videos, contacts, messages, call logs, and apps between mobiles. If you want to transfer data between Android and iPhone, it must be the best solution for you. Try it free. Follow the steps below to know how to transfer data between Android and iPhone.
Dr.Fone - Phone Transfer
Transfer Data between Android and iPhone in One Click.
- 1 CLick to transfer contacts from Nokia C02 to iPhone.
- Easily transfer photos, videos, calendar, contacts, messages, and music from Nokia C02 to iPhone/iPad.
- Works perfectly with Apple, Samsung, HTC, LG, Sony, Google, HUAWEI, Motorola, ZTE, Nokia, and more smartphones and tablets.
- Fully compatible with major providers like AT&T, Verizon, Sprint, and T-Mobile.
- Supports iPhone, iPad, iPod touch and the latest iOS version.
- Fully compatible with the latest Windows or Mac version.
3981454 people have downloaded it
Note: If you have no computer at hand, you can also get the Dr.Fone - Phone Transfer (mobile version) from Google Play, with which you could log into your iCloud account to download the data, or transfer from iPhone to Nokia C02 using an iPhone-to-Android adapter.
Step 1. Download Dr.Fone - Phone Transfer to transfer from Nokia C02 to iPhone
Launch Dr.Fone. You will see “Phone Transfer”. Click it.

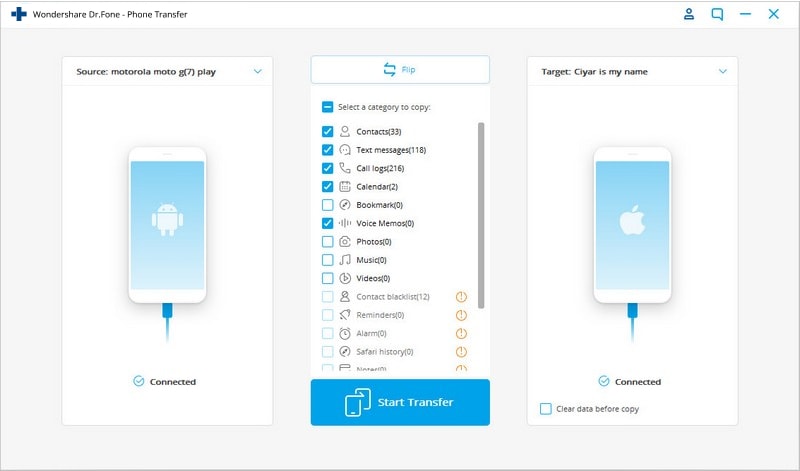
Step 2. Connect Phones and select files
Connect your Android and iPhone. Dr.Fone will detect it soon. Then select the files and click Start Transfer. It can transfer almost all files, contacts, apps, messages, photos, music, videos, etc. If you just want to transfer contacts from Nokia C02 to iPhone, then it is also ok. Just check the Contacts option to transfer contacts from Nokia C02 to iPhone easily.
Conclusion
Regardless of the fact that many free solutions are there that can help you transfer data from your Nokia C02 to iPhone. If you also have an Android device, the Dr.Fone - Phone Transfer always has an upper hand when it comes to providing hassle-free migration between iPhone and Android devices.
How to Copy Data from Samsung to Pixel 8 and Pixel 8 Pro
Getting a new phone is incredibly exciting, but once you realize how much data you need to transfer, the experience can take a sudden turn for the worse. Fortunately, there are now multiple ways to transfer data from your old phone to a new device, and we’re here to help you with these.
Today’s article will teach you how to transfer data from a Samsung to a Google Pixel device with the help of Wi-Fi, USB cables, Google Drive, and a third-party app. Stay with us to learn how to copy data from Samsung to Pixel with these seven incredibly convenient methods.

Transfer Data From Samsung to Pixel 8 and Pixel 8 Pro via Dr. Fone Phone Transfer

While a third-party data transfer app might not be your first thought, they’re undoubtedly worth checking out as they can make the entire experience flow much more seamlessly. Wondershare Dr.Fone is one such app, and it’s a toolkit designed to help you manage your Nokia C02] and other smartphones and make the most out of your journey. It has been on the market for over 17 years, meaning it’s reliable, trustworthy, and highly efficient.
On top of effortless file transfers between phones, the toolkit also offers numerous advanced phone features, such as:
- Screen Unlock;
- Data Eraser;
- Data Recovery;
- System Repair.
These advanced capabilities make Wondershare Dr.Fone an all-in-one phone manager with everything you’ll ever need. It’s also the best option for data transfers between two devices since it’s compatible with more than 8,000 smartphones and supports all sorts of data types, making the transfer process as easy as possible.
Here’s how you can use Wondershare Dr.Fone to transfer data from a Samsung device to a Pixel 8/Pixel 8 Pro:
- Download Wondershare Dr.Fone from the official website and launch it on your PC.
- Connect the Samsung and the Pixel 8/Pixel 8 Pro phones to the PC.
- Navigate to Toolbox > Phone Transfer.


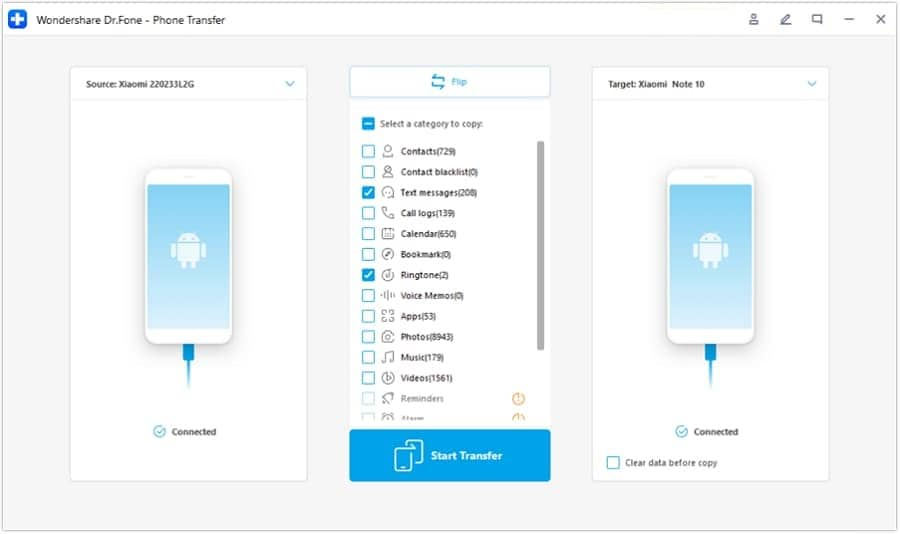
- Select the Sourcedevice (Samsung) and your Destination device (Pixel 8/Pixel 8 Pro). You can also use the Flip option to switch the file transfer’s direction if you ever need to.

Select the types of data you want to transfer and hit the Start Transfer.
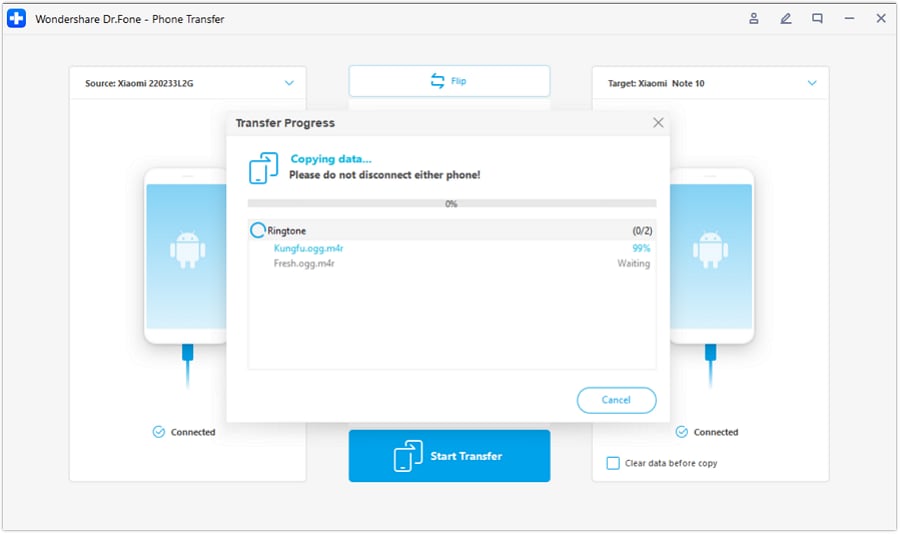
The progress bar will appear. You can click the Cancel button if you wish to pause the process.
You’ll be notified when the process is complete. Tap OK.
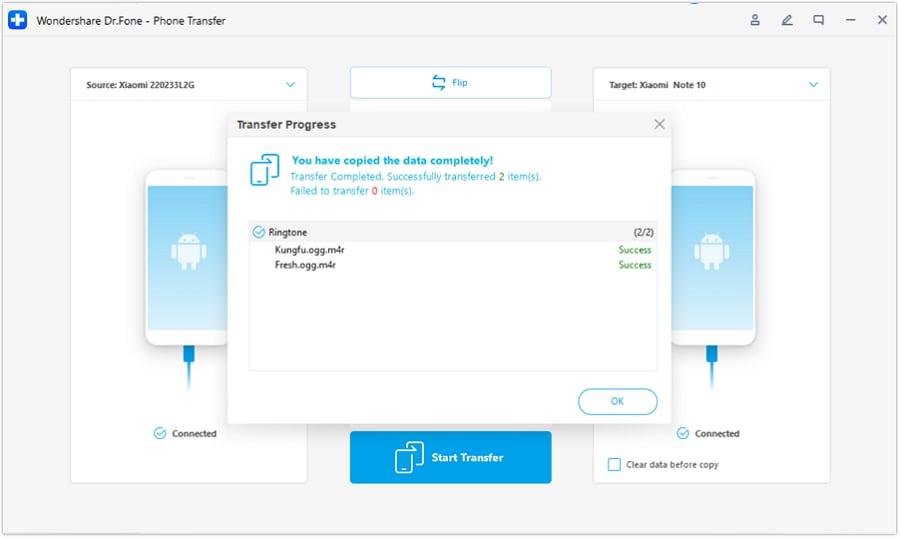
Once you see that the file transfer between your Samsung and Pixel 8/8 Pro devices has been completed, you can disconnect your phones from the PC and start using your new Pixel phone. You should then check if all the data has been transferred.
Transfer Data From Samsung to Google Pixel 8 and Pixel 8 Pro Using Wi-Fi
Users who want to avoid downloading apps can use the built-in file transfer app instead. All Android phones include a data transfer tool that appears when setting up a new device. Using it is incredibly straightforward, and all you need to do is follow the on-screen instructions to initiate a file transfer between your old and new phone over Wi-Fi. Here’s how:
Power on your new Pixel phone and tap the Get startedbutton during the initial setup. Choose to restore from an old phone.
Connect the Nokia C02 device to a Wi-Fi network.
Choose the “Can’t use old device” option and sign in with your Google account.
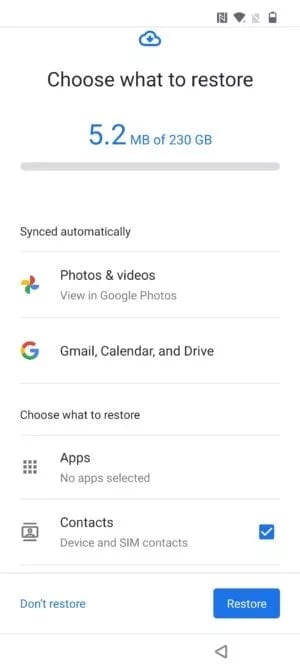
Select which apps and types of data you want to transfer to it and tap Restore.
- Follow the file transfer instructions and watch as data copies from your old Samsung to your new Pixel 8/8 Pro device.
Your new phone will notify you when the file transfer is complete, and you can continue using your brand-new device right where you left off with the Samsung one.
Copy Data From Samsung to Pixel 8 and Pixel 8 Pro Using USB
If you don’t want to transfer files over a Wi-Fi network, don’t want to waste your mobile data, or wish to complete the file transfer the old-fashioned way with a USB cable, you can follow these steps to transfer data from Samsung to Pixel:
- Turn on your new Pixel 8/8 Pro device and launch the built-in data transfer tool that appears when setting up your device.
- Hit the Get started button on your Pixel phone and connect to a Wi-Fi network (this is required to initiate a data transfer, regardless of your connection).
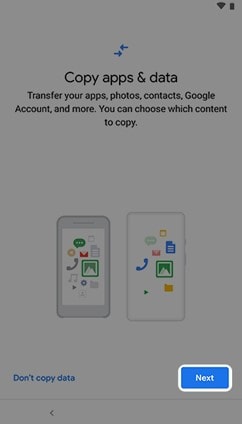
- Tap on Nextwhen you see the “Copy apps and data” screen. Click Next again when prompted to use your old phone.
- Connect the USB cable between your old Samsung and new Pixel 8/8 Pro phones and tap Next.
- Confirm data transfer on your old phone, select what you want to transfer, and hit Copy.
- Follow the rest of the on-screen instructions and transfer data between your old and new phones.
Give your phones a few minutes to transfer data from Samsung to Pixel, and remember that it can even take several hours, depending on your phone’s internal storage size and filled space. The built-in file transfer app will notify you once it completes everything.
## Transfer Files to Pixel 8 and Pixel 8 Pro via PCUsing a computer as an intermediary device for transferring files is another excellent idea, and it’ll even let you organize your old phone’s data before you copy it to your new device. You’ll need to follow these steps to transfer data from your old phone to your PC and from your PC to your new Pixel 8/8 Pro device:
- Connect your old Samsung device to your PC via USB.
- Tap the phone’s notification and select File Transferunder the “Use USB for” option.
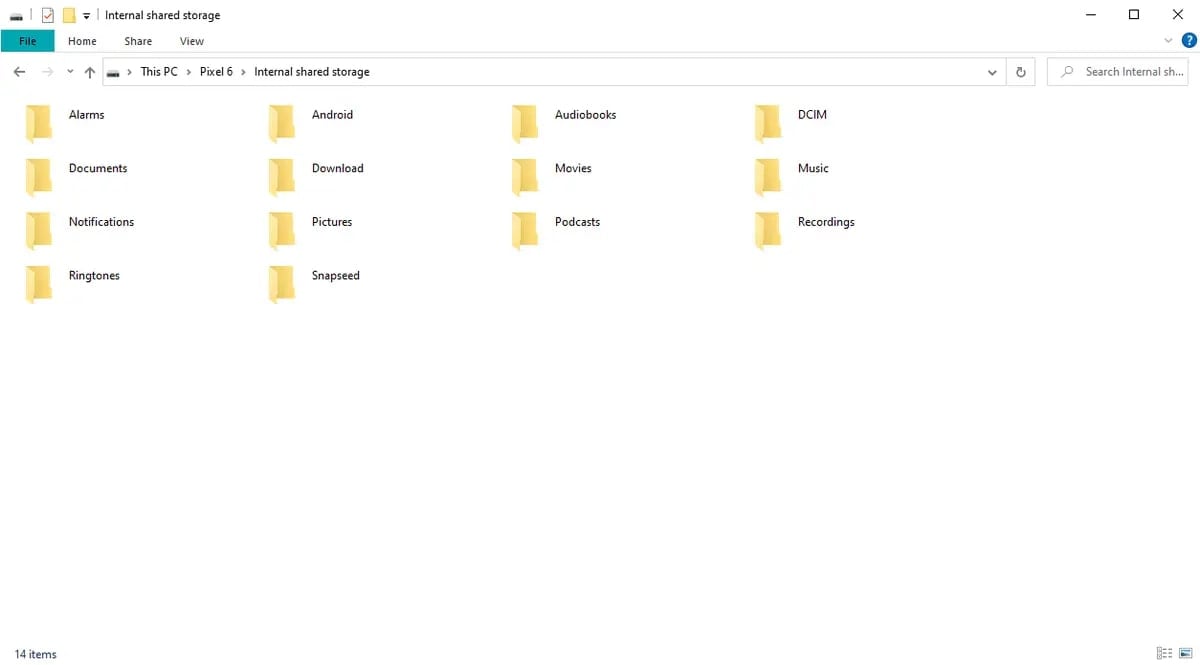
- Access its memory through the computer’s File Explorer.
- Select the files and folders you want to copy and transfer them to a new folder on your PC. You can then go through these files on your PC, delete what you don’t need, and organize everything before transferring the data to your new Pixel 8 device, but this is optional.
- Disconnect the old phone from the computer.
- Connect your new Pixel phone to the PC.
- Once again, click the phone’s notification and select the File Transfer
- Transfer the contents of your computer’s folder onto the new device.
- Disconnect the new device after your files have been copied.
You’ll need to consider which types of files go into which folders. For example, you’ll need to ensure that music data goes into Android’s Music folder, pictures and videos go into Camera or DCIM folders, and documents and downloads have their respective folders, which are typical on Android.
Copy Data From Samsung to Pixel 8 Pro via Quick Switch
Another excellent option for transferring files to any Pixel phone is with Google’s Quick Switch adapters. These free OTG devices are included in every Pixel phone box and are designed to help you transfer data from an old phone to a new Pixel device.
A Quick Switch adapter connects to your Pixel phone, and you can insert a Samsung-compatible USB cable on the other end to start the transfer process.
Here’s what you’ll need to do:
Power on your new Pixel 8/8 Pro phone and click Start.
Plug the Quick Switch adapter into the Pixel device and connect the USB cable with the USB-A end into the Quick Switch. Connect the other end to the Samsung phone.
Unlock your Samsung device and click the Copy
Select the type of data you want to transfer and hit Copy.
Once the process is complete, click Next > Done.
Before you start the file transfer process using a Quick Switch, you should ensure both devices are fully charged. Furthermore, you should also update your Samsung device to the latest software version to avoid potential transfer issues, such as data corruption or incomplete transfers.
Transfer Data From Samsung to Pixel Using Google Drive
Being an Android user requires a Google account, granting you access to 15 GB of free storage space on Google Drive, making the app an excellent way to transfer files from your old phone to your new one. Here’s how you can use it:
Using your old Samsung phone, navigate to Settings> Accounts and Backup> Back up data under Google Drive.
Change the Backup detailsand add the types of data you want to back up.
Hit the Back up nowbutton and give your phone time to upload everything to Google Drive. You can watch the progress at the top of your screen.
Power on your new Pixel 8/8 Pro device and follow the on-screen setup instructions.
Log in with the same Google account you used on the Samsung phone.
The new device will immediately recognize older backups.
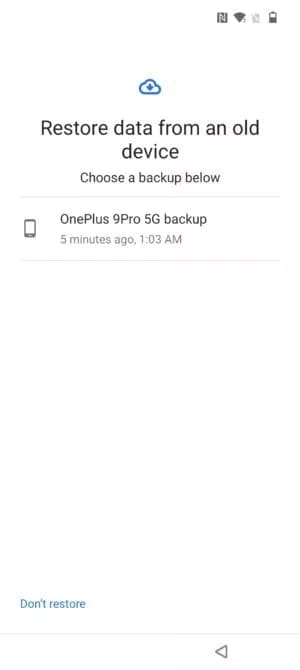
- Choose the latest backup made on your Samsung phone and tap Restoreto copy data from Samsung to Pixel.
It’s worth noting that Google Drive users aren’t limited to 15 GB of storage space, as paid plans also include 100 GB and 200 GB options for a few dollars per month, making this type of transfer incredibly efficient.
Transfer Data From Samsung to Google Pixel 8, 8 Pro Using Email
Although it’s not as effective as the abovementioned methods, email is also an option for transferring data between phones. Using it is as straightforward as sending emails, meaning that this method is effortless, and anyone can do it. Here’s how:
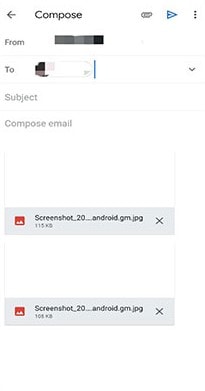
- Open your old Samsung phone’s email app and compose a new email.
- Hit the attachment icon and add your files to the email. Send it to whomever you like or to your secondary email account.
- Launch the email app on your new Google Pixel 8 or 8 Pro device.
- Download the email attachments you’ve just sent.
Please note that while email providers like Gmail, Yahoo, or Hotmail might not have restrictions on the number of files you can send, they do restrict emails to 25MB in size. It essentially means that this method will work for smaller files but isn’t viable if you need to transfer large sets of data.
Conclusion
Transferring data from one smartphone to another can be challenging, especially if you’re new to the whole thing or do it manually. To help you out, we’ve prepared the top seven methods for handling data transfers from Samsung to Google Pixel, which include the built-in data transfer tool during device setup, USB cables, Quick Switch adapter, Google Drive, email, and a dedicated third-party app – Wondershare Dr.Fone.
As you can see, it’s your safest bet, ensuring the most straightforward and fastest data transfer between your old and new device. This way, you won’t need to organize and transfer anything manually or risk losing data, and Wondershare Dr.Fone can be used even after the initial device setup.
How Can You Transfer Files From Nokia C02 To iPhone 15/14/13?
Just got a shiny new iPhone 15/14/13 but don’t want to lose all your file data from your old Android phone? Transferring information from an Android device to an iPhone can seem daunting, but it doesn’t have to be. With the right tools and steps, you can seamlessly move your contacts, photos, videos, apps, and other important files from your Android to your iPhone 15/14/13 in no time.
In this guide, we’ll walk you through the easiest ways to transfer data from an Android smartphone to an iPhone 15/14/13, including both wired and wireless options. Whether you want to move your WhatsApp history, Google Photos library, or entire media collection, we’ve got you covered. With either a direct USB cable transfer, or dedicated mobile transfer app, you’ll have all your Android data on your new iPhone set up just the way you like it.
Follow our simple step-by-step instructions below to get started moving your file data from Nokia C02 to iOS today!
Part 1: Transfer Data From Nokia C02 to iPhone 15/14/13 Using Move To iOS
The easiest way for most people is to use the Move to iOS app that Apple created specifically for switching from Android. Here’s how:
Step 1: On your Nokia C02, download Move to iOS from the Google Play Store.
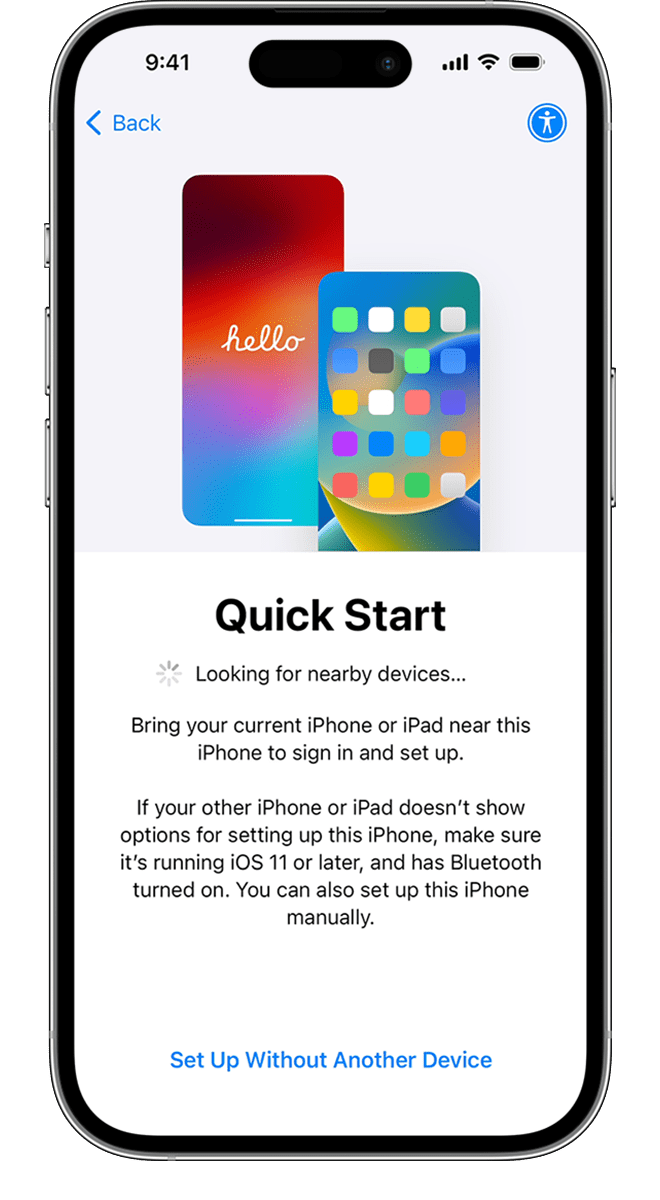
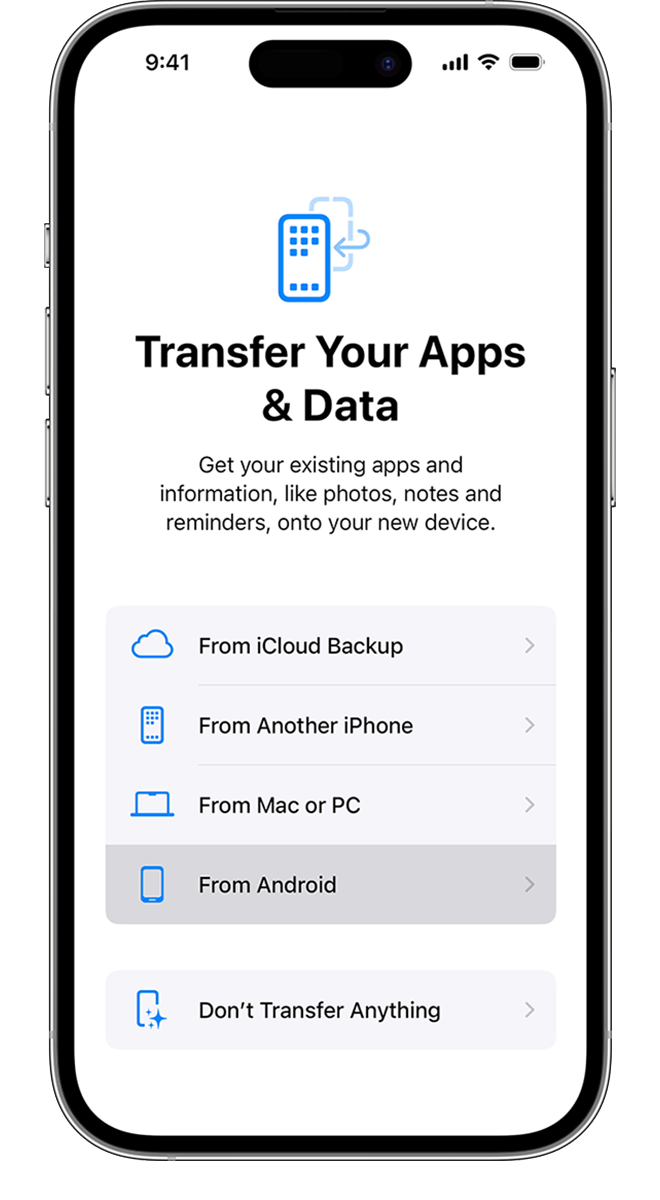
Step 2: When setting up your new iPhone 15/14/13, select the option to transfer data from Android.
Step 3: Open the Move to iOS app on your Nokia C02 and tap Continue.
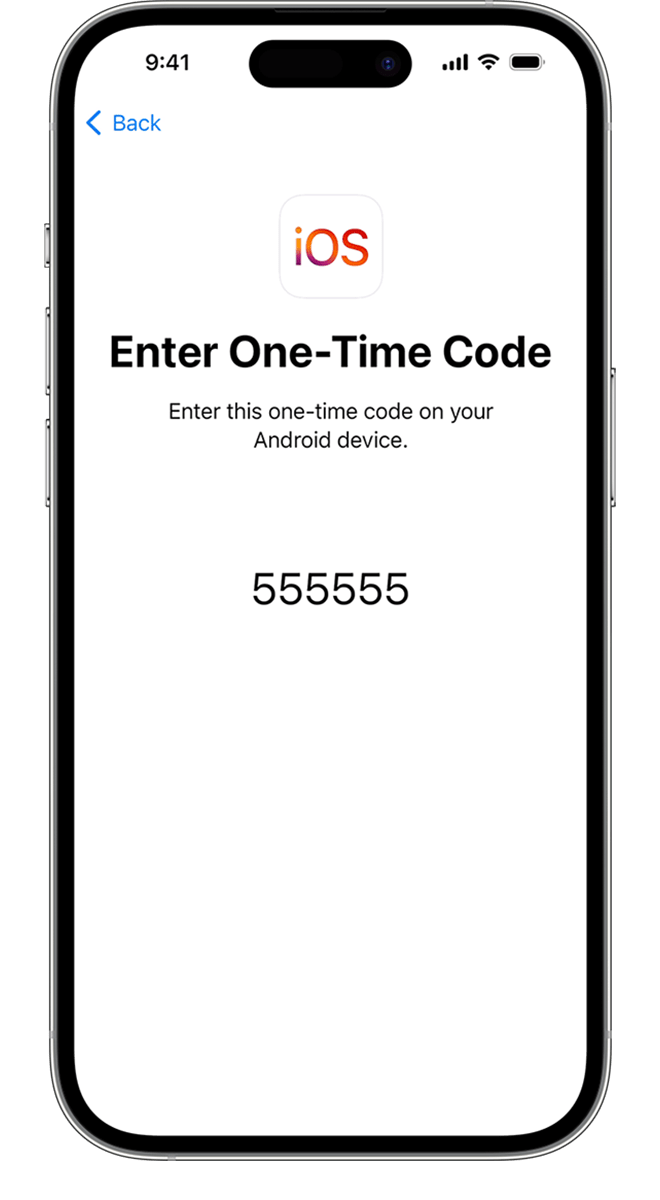
Step 4: Wait for a 6 or 10-digit code to appear on your iPhone and enter it on your Nokia C02.

Step 5: Connect both phones to the same WiFi network that your iPhone created.
Step 6: On Android, select the content you want to transfer like contacts, messages, photos, etc.
Step 7: Wait for the transfer process to finish, then tap Done on Android and Continue on iPhone.
Part 2: Transfer Data From Nokia C02 to iPhone 15/14/13 Using USB Cable
You can also connect your Nokia C02 directly to your new iPhone with the charging cable that came with your iPhone to transfer files:
Step 1: Connect your Nokia C02 to your iPhone with the cable.
Step 2: On your Nokia C02, tap Allow to give permission.
Step 3: On iPhone, select Trust when prompted.
Step 4: In Files on iPhone, select the name of your Nokia C02.
Step 5: Select the content you want to transfer and tap Copy or Move.
Step 6: Choose a location on your iPhone like Photos to transfer the files.
And that’s it! With these simple steps, you can easily move your important info, photos, videos, and other content from your old Android to your slick new iPhone 15/14/13.
Part 3: How Can You Transfer Data From Nokia C02 To iPhone 15/14/13 Using Google Drive?
If you have files stored on Google Drive, you can easily access them on your new iPhone by:
Step 1: Make sure everything you want to transfer is uploaded to Google Drive on your Android.
Step 2: On your iPhone 15/14/13, download the Google Drive app from the App Store.
Step 3: Sign into your Google account in the app and set Google Drive as a storage location.
Step 4: Your Google Drive content will now be available on your iPhone!
Part IV: How To Transfer Particular Data From Nokia C02 To iPhone 15/14/13?
Want to move all your precious data from your Nokia C02 over to your new iPhone 15/14/13? With some simple steps, you can easily transfer your contacts, photos, messages, and other key data.
Method 1: Transfer Contacts Using Sim Card
If you stored all your contacts on your Nokia C02’s SIM card, you’re in luck! This is the easiest way to move them to iPhone 15/14/13. Here’s how:
Step 1: Remove the SIM card from your Nokia C02 and insert it into your iPhone 15/14/13.
Step 2: Open Settings and tap “Contacts Manager”.
Step 3: Choose “Manage SIM Card Contacts”.
Step 4: Tap “Import from SIM Card”.
And it’s done! All your SIM contacts are now safely stored on your iPhone.
Method 2: Transfer Photos Using Google Photos App
The Google Photos app makes it a breeze to transfer all your Android photos and videos over to your shiny new iPhone 15/14/13:
Step 1: Download the Google Photos app on your iPhone 15/14/13 if you haven’t already.
Step 2: In the Google Photos app on your Nokia C02, turn on Backup & Sync in Settings.
Step 3: On your iPhone Google Photos, enable Backup & Sync too.
Step 4: Give it some time, and all your media will transfer automatically from Nokia C02 to iPhone!
Method 3: Transfer Messages Using SendAnywhere
If you use messages a lot, you’ll surely want to move your messaging history from your Android. The SendAnywhere app handles this seamlessly:
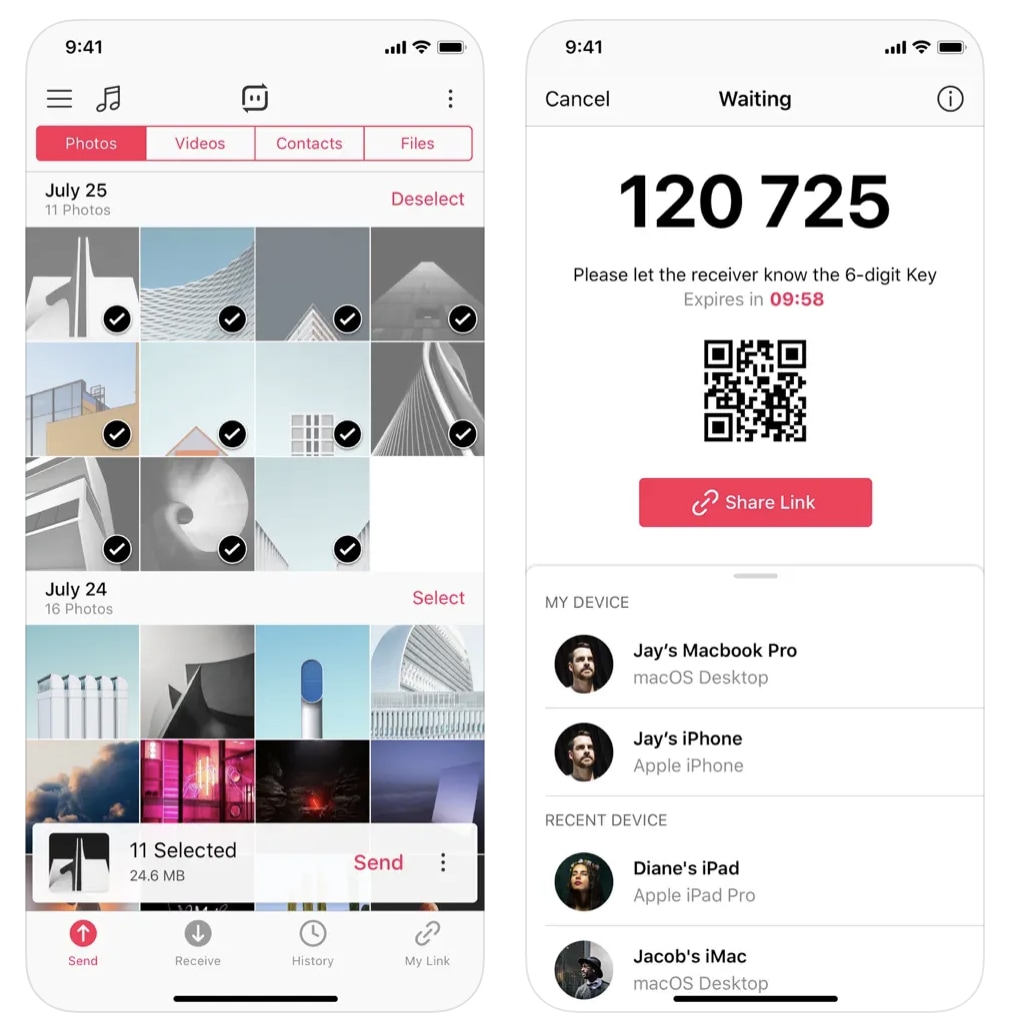
Step 1: Download SendAnywhere on both your Android and iPhone.
Step 2: Choose your Android as the Sender and, iPhone as the Receiver.
Step 3: Select “Messages” when prompted for what data to move.
Step 4: Enter the OTP code displayed on Android into your iPhone.
Step 5: Hit upload on Android and watch your messages move!
Transferring from Nokia C02 to the new iPhone 15/14/13 doesn’t have to be painful. With SIM contacts, Google Photos, SendAnywhere, and other clever tricks, you can make the switch smoothly and focus on enjoying your new phone!
Part V: Transfer Data From Nokia C02 To iPhone 15/14/13 in One Click Using Dr.Fone
If you’re shifting from an Android phone to an Apple device, then this is for you! As you get your brand new iPhone 15/14/13, you may wonder how you can transfer all your data in one go to your new phone. This includes all your contacts, photos, apps, and other vital data from your Nokia C02. But don’t worry, for a hassle-free and easy way to transfer your data you can use the incredible Dr.Fone Phone Transfer ! You can quickly and seamlessly transfer all that important stuff to your slick new iPhone 15/14/13 in no time. So, let’s get right into it and see how you can transfer data from Nokia C02 to iphone 13!
First thing first, get your Nokia C02 and new iPhone 15/14/13 ready them sufficiently charged during the transfer process.
Dr.Fone’s phone transfer feature makes switching data from Nokia C02 to iPhone easier than you can imagine. Just follow these simple steps:
Dr.Fone - Phone Transfer
1 Click to Transfer Data From Nokia C02 To iPhone
- Move data between devices with different OSs, i.e. iOS to Android.
- Transfer contacts, SMS, photos, videos, music, and more types.
- Simple, click-through process
- Compatible with the newest Android and iOS system.
3981454 people have downloaded it
Step 1: Download and install the Dr.Fone software on your Windows PC or Mac computer. Head to the official website drfone.wondershare.com and get the version compatible with your computer’s operating system. Installation takes just minutes.
Step 2: Use the USB cables provided with your Nokia C02 and iPhone to connect both phones to your computer. Dr.Fone will automatically recognize the two connected devices. Make sure to enable USB debugging on the Android device first.

Step 3: Launch the Dr.Fone app on the computer and click on the “Phone Transfer” module. The user-friendly phone switch interface opens up, ready to shift your data.
Step 4: Select your Nokia C02 as the “Source” and your iPhone as the “Destination”. Click “Flip” anytime to change direction. Also, choose what data types to transfer - contacts, messages, photos, videos, music, etc.

Step 5: Finally, hit the “Start Transfer” button and Dr.Fone will seamlessly shift the selected data from Nokia C02 to iOS. The progress is displayed on screen.

And that’s all it takes! In minutes, Dr.Fone securely transfers your essential data making your switch to the iPhone a breeze. Quick, hassle-free, safe - phone transfer doesn’t get easier than this!

So go ahead – move your life to your terrific new iPhone 15/14/13 in minutes with the exceptional data transfer powers of Dr. Fone’s Phone Transfer tool! Bid goodbye to manual processes or slow wireless transfers. For swift, simple, and safe Android to iOS transfer, Dr Fone is your go-to digital companion!
Conclusion
Transferring your precious data to a new iPhone 15/14/13 doesn’t have to be a headache. With smart use of your SIM card, cloud storage apps like Google Photos, file transfer apps like SendAnywhere, or sophisticated switchers like Dr.Fone , you can seamlessly move your contacts, photos, media files, chats, and more from Android to iPhone. Whether you want to transfer a few vital files or the whole data - music, movies, documents and all - you now have several failure-proof methods to choose from.
So go ahead and make the switch to that new iPhone 15/14/13 without compromising any precious data. Use these time-tested techniques to swiftly move key files like WhatsApp data, photos, contacts, and different types of files from Samsung or any Android to your Apple device. Give your new iPhone a rousing welcome by easily transferring all that Android data!
- Title: How to Transfer Data from Nokia C02 to Any iOS Devices | Dr.fone
- Author: Emma
- Created at : 2024-07-17 19:58:33
- Updated at : 2024-07-18 19:58:33
- Link: https://android-transfer.techidaily.com/how-to-transfer-data-from-nokia-c02-to-any-ios-devices-drfone-by-drfone-transfer-from-android-transfer-from-android/
- License: This work is licensed under CC BY-NC-SA 4.0.