
In 2024, 5 Easy Ways to Copy Contacts from Vivo V29 to iPhone 14 and 15 | Dr.fone
5 Easy Ways to Copy Contacts from Vivo V29 to iPhone 14 and 15


Upgrading to iPhone 14 or 15 after using an Android smartphone for a long time is indeed a big leap. Why so? The simplest explanation is that these two mobile devices run on a completely different operating system. But don’t worry. With regard to data migration, the process has become much more convenient today than before. Big thanks to highly advanced technology and modern practices.
The contact list is among the most important data stored on our mobile phones. That’s why it is the first thing users want to secure during transfer. Adding the phone numbers manually to the mobile directory is undoubtedly the safest migration method. But in today’s digital world, there are lots of easy techniques to copy contacts from Vivo V29 to iPhone. No need to exert much time and tremendous effort. You can literally get this done within a few minutes.
In this article, we will provide a few tutorials on how to export contacts from Vivo V29 to iPhone. We will also list down some preparation tips to help you finish the procedures smoothly. Continue reading below to learn more.
Can You Copy Contacts From Vivo V29 to iPhone?
Data transfer doesn’t only happen when you get a new mobile device. In fact, it is actually a common procedure that many users initiate from time to time. Let’s say you’re asked to send a particular contact detail to a specific person at your place of work. Another possibility is that you prefer to view Your Vivo V29book from both your personal and business smartphones. That’s why having a convenient and effective means to copy contacts from Vivo V29 to iPhone is very helpful. Imagine all it takes is a few taps to send your address book from one end to another.
There are numerous ways to export contacts from Vivo V29 to iPhone 14 or 15. But to get promising results, you definitely have to choose the best method applicable to your current situation. Take note that you’re transferring files between two devices with different operating systems. Therefore, there’s probably no direct method to commence such procedures. You have to go through a series of steps in order to copy contacts from Vivo V29 to iPhone. But don’t worry. Most of them are indeed a walk in the park. No technical skills or advanced equipment are required to complete the process.
5 Techniques to Export Contacts From Vivo V29 to iPhone 14 or iPhone 15
“How do I transfer contacts from Vivo V29 to iPhone 14 or iPhone 15?” As mentioned earlier, data transfer between two devices is now as easy as falling off a log. It’s no longer required to engage in manual work because most of the steps involve automation. To help you in this regard, below are the top five techniques to copy contacts from Vivo V29 to iPhone. Just try to commence each solution and find the best one that brings good progress.
Method 1: Import vCard to iCloud
You can instantly copy contacts from Vivo V29 to iPhone 14 or 15 by simply uploading your contact list to iCloud. Just make sure you’re uploading a Virtual Card File and your device is synced to your iCloud account. Here’s a quick guide on how to do it in easy steps.
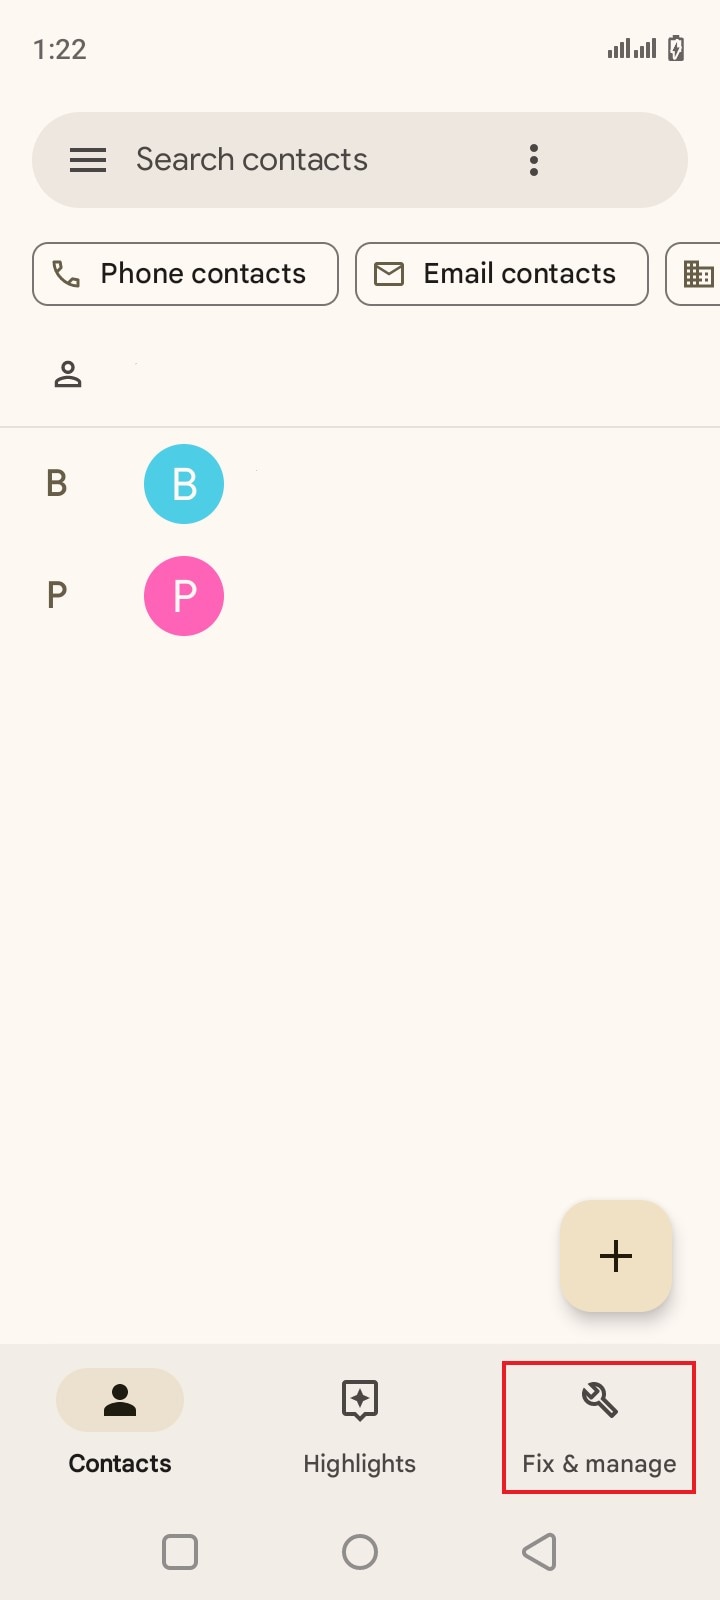
- Step 1: Open the Contacts app on your Android smartphone.
- Step 2: Click Fix & Manage to bring out the settings.
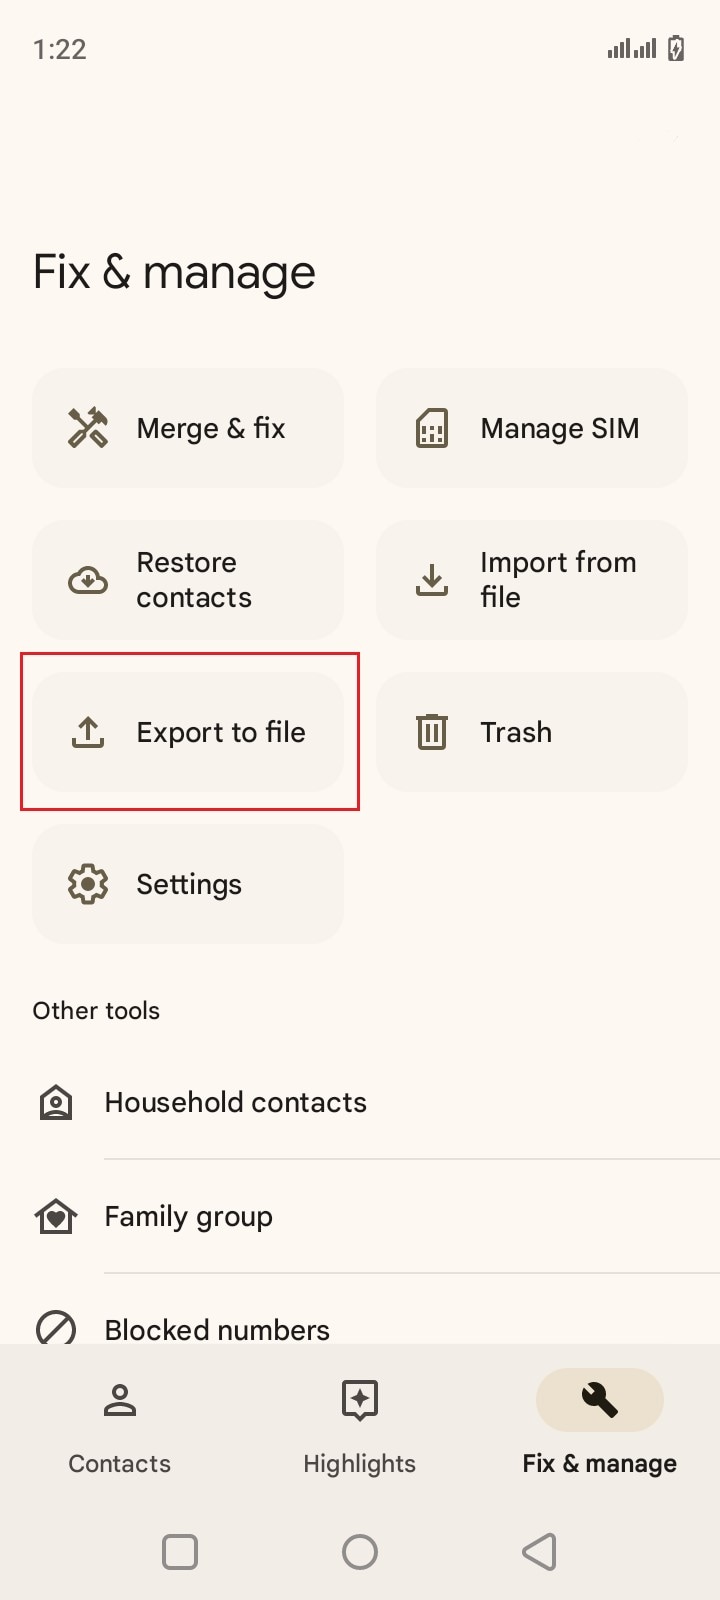
- Step 3: Click Export to File.
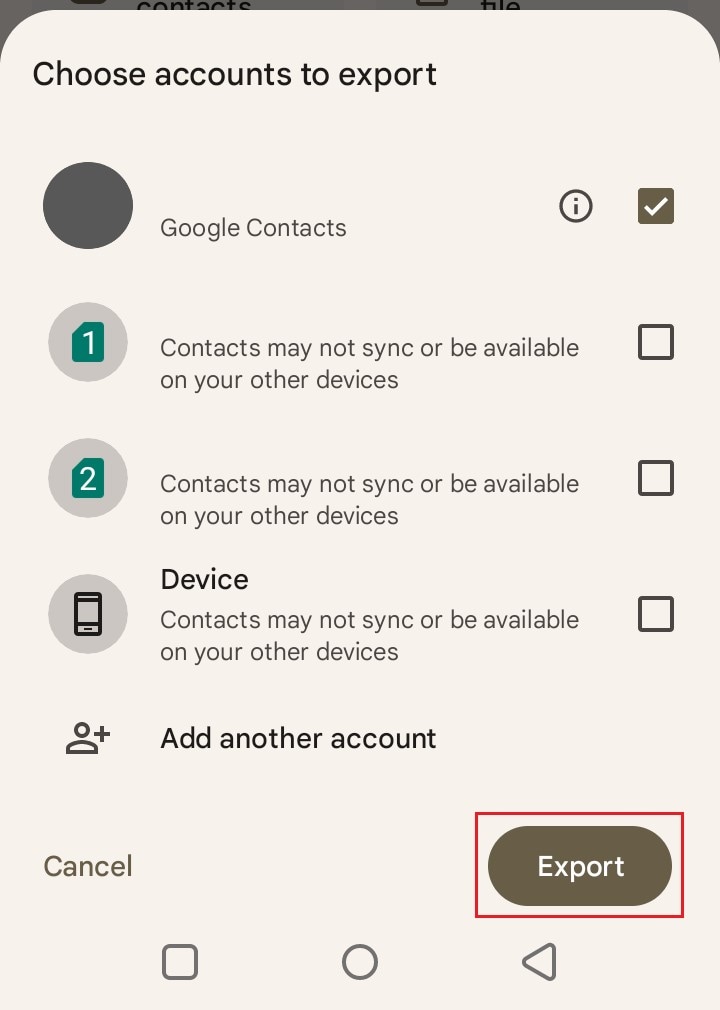
- Step 4: Choose the contact list you want to export. Then click Export.
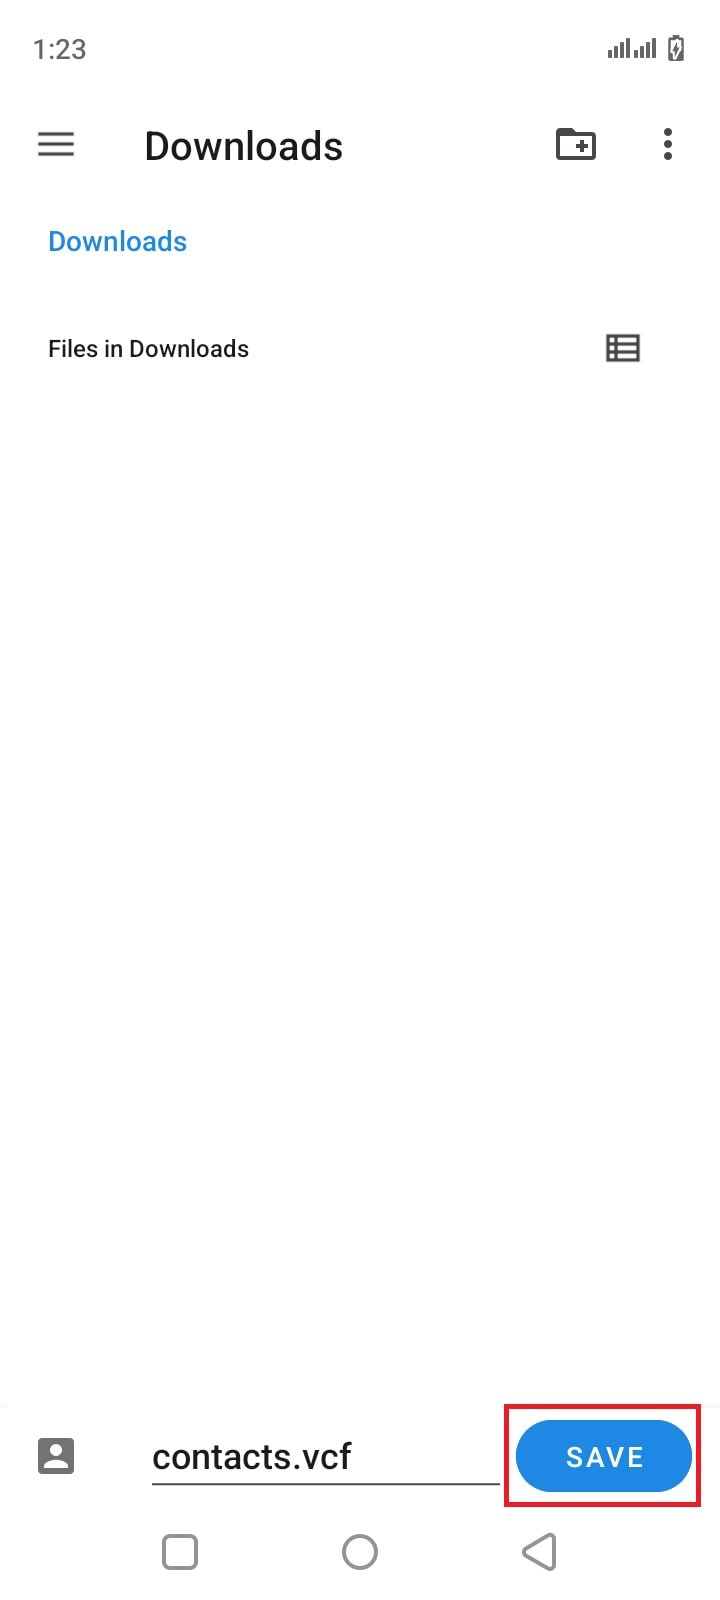
- Step 5: Choose a specific folder where you want to save the exported VCF. Right after, click Save.
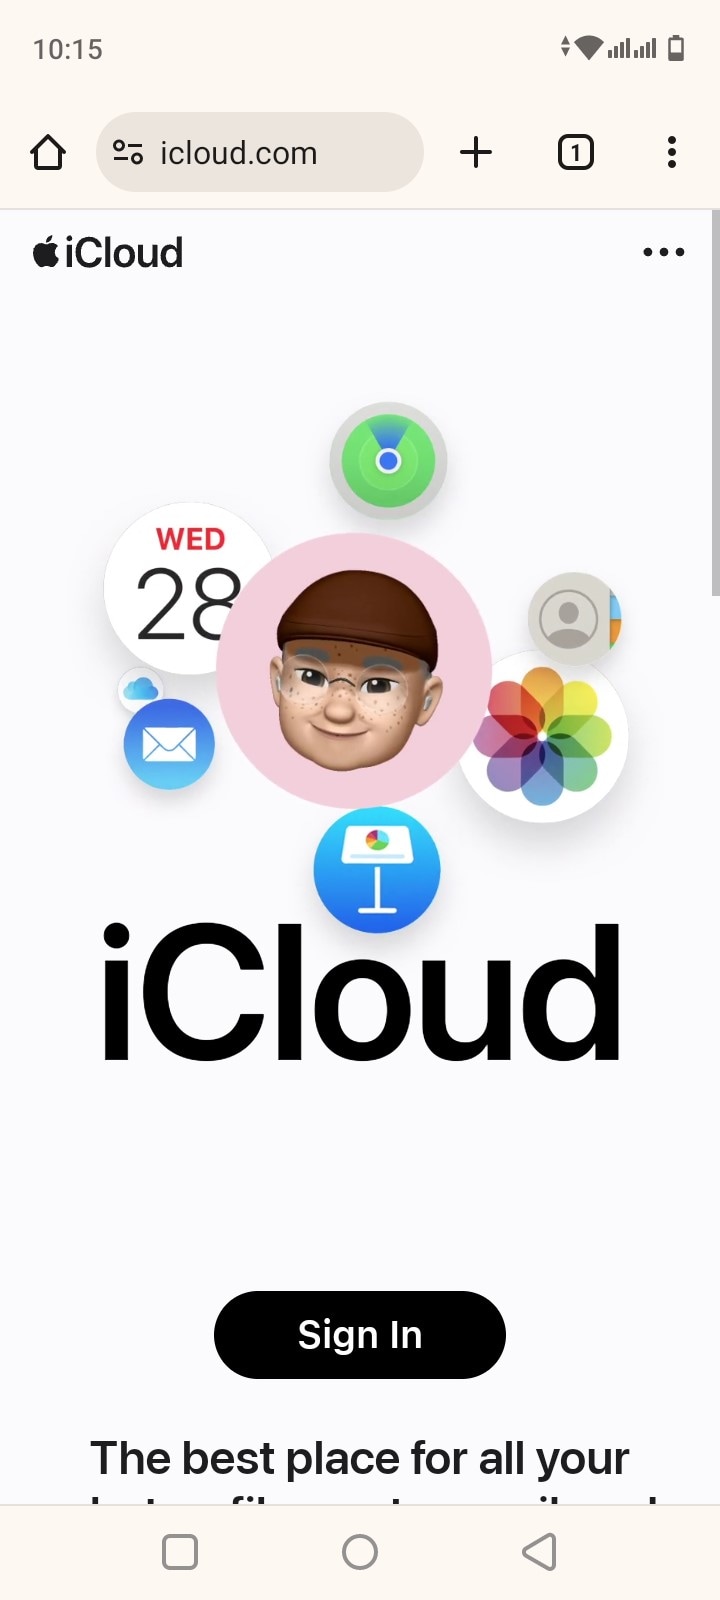
- Step 6: Upload the vCard to your iCloud account. Log in to icloud.com using your Apple and then click Contacts > Settings gear icon > Import vCard.
- Step 7: Lastly, sync your iPhone to iCloud and then check your contact list from the app.
Method 2: Import contacts from Google account
Are you using Google Contacts on your Android smartphone? Or, at the very least, do you back up your phone book to your Google account? If so, you can easily export contacts from Vivo V29 to your iPhone via your Gmail account. Here’s how to do it in easy steps.
- Step 1: Launch the Settings app on your iPhone.
- Step 2: Click Mail.
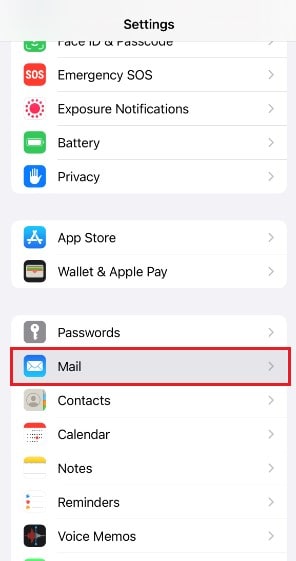
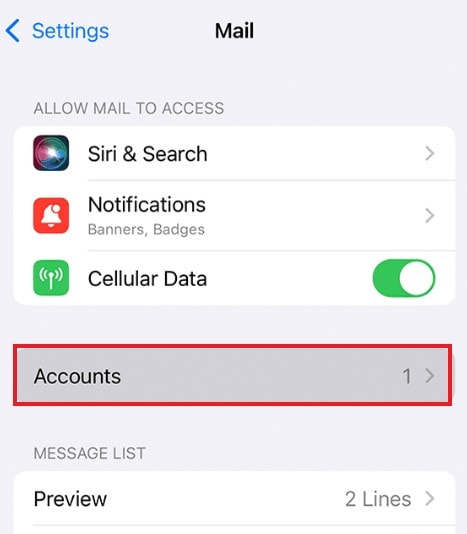
- Step 3: Click Accounts.
- Step 4: Select Google.
- Step 5: Log in to your Gmail account that contains your contact list.
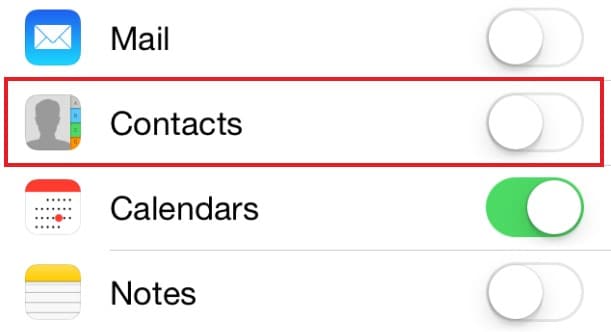
- Step 6: The settings for your Gmail account will appear once you have successfully logged in on your iPhone. Toggle on the radio button next to Contacts to sync your phonebook with the new device.
Method 3: Copy contacts from the SIM card to your iPhone
Another way to export contacts from Vivo V29 to iPhone is with the aid of your SIM card. Simply save your phonebook to the SIM card and import it on your iPhone. Here’s a simple guide to help you commence this procedure.
- Step 1: On your Android smartphone, move all your contacts to the SIM card. Once completed, eject the card and insert it into your new iPhone 15. Wait until the SIM card has been recognized.
- Step 2: Open the Settings app on your iPhone.
- Step 3: Click Contacts.
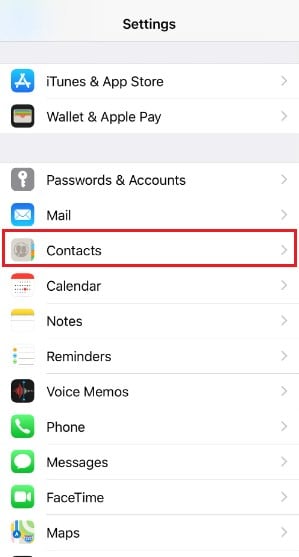
- Step 4: Click Import SIM Contacts.
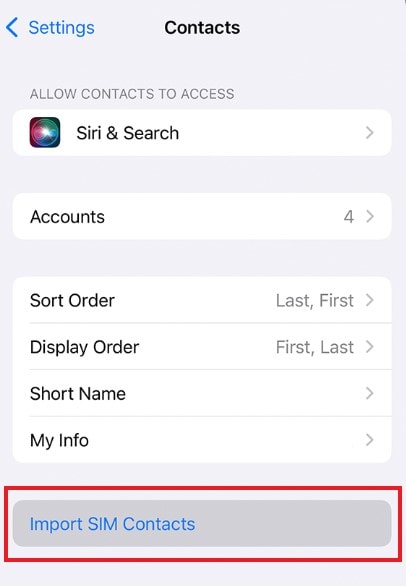
- Step 5: Once completed, check the Contacts app and find the newly imported directories.
Method 4: Export contacts from Vivo V29 to iPhone using Move to iOS
Move to iOS is an Android mobile application you can use to migrate your files to your new iPhone 14. It is free and easy to navigate. Here’s a quick guide on how to copy contacts from Vivo V29 to iPhone using the Move to iOS app.
- Step 1: Download the Move to iOS application on your Android smartphone.
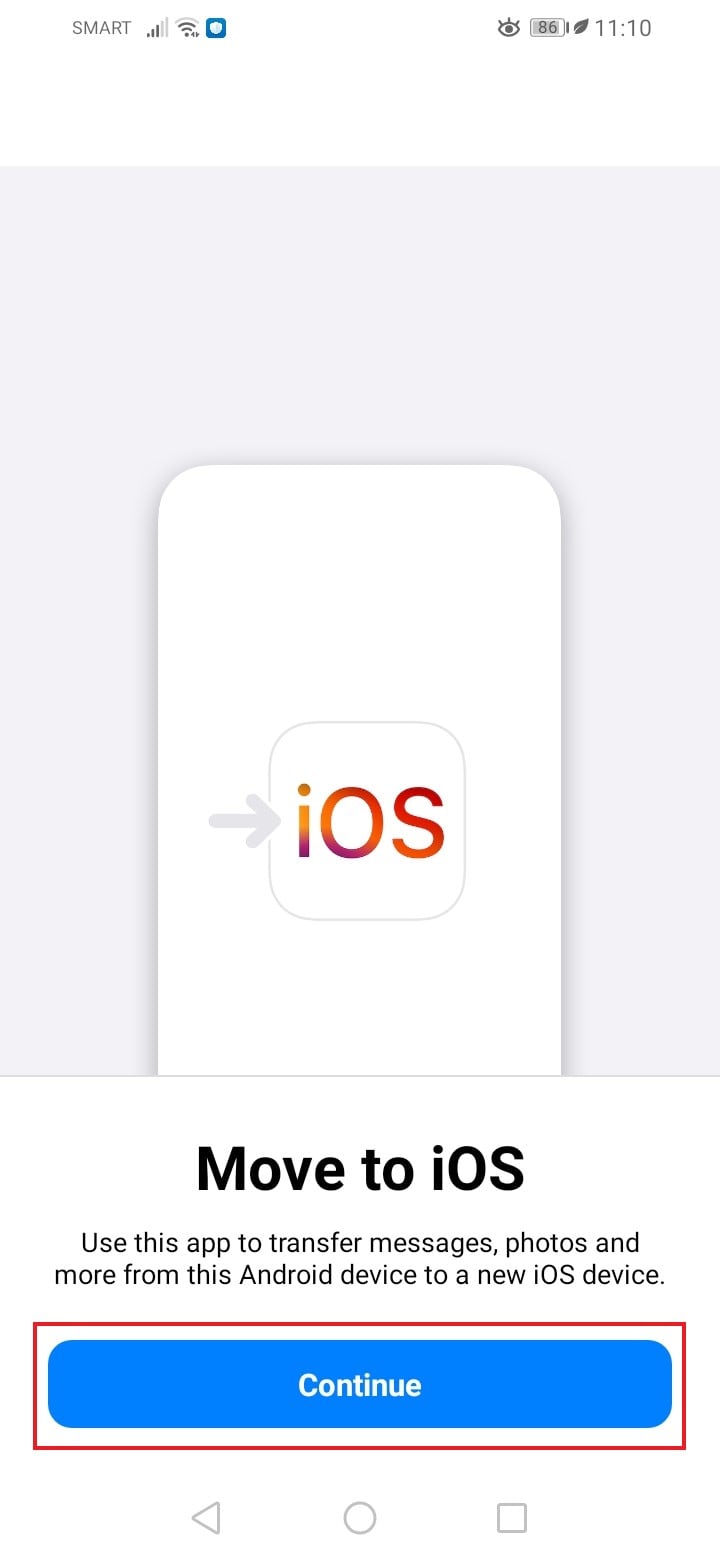
- Step 2: Launch the app on your device afterward.
- Step 3: Click Continue.
- Step 4: Read the Terms and Conditions and then click Agree.
- Step 5: On the Find Your Code page, click Continue.
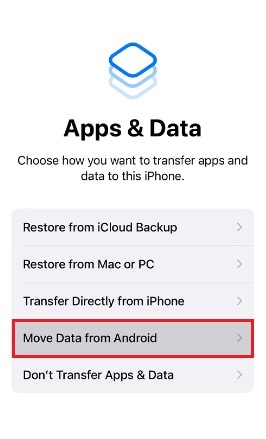
- Step 5: To proceed, make sure your iPhone is on the iOS setup page. From there, click Move Data From Android. Your iPhone will then show a unique code.
- Step 6: On your Android smartphone, key in the code displayed on your iPhone screen.
- Step 7: Choose Contacts. After that, wait for the data transfer to start and finish.
Method 5: Copy contacts from Vivo V29 to iPhone using Wondershare Dr.Fone
The easiest way to export contacts from Vivo V29 to iPhone is by means of third-party phone transfer software. Wondershare Dr.Fone is one of the best tools that can help you a lot in this regard. Its phone transfer feature is designed to initiate and complete data migration with just the snap of a finger. Here’s a short guide on how to use it in easy steps.
- Step 1: Download Wondershare Dr.Fone from its official website. Install it on your computer.
- Step 2: Launch the newly installed Wondershare Dr.Fone on your desktop. Wait until the application has fully loaded.
- Step 3: Navigate the left-side panel and then click Toolbox. On the main dashboard, click Phone Transfer.
Parental Control Software
- Step 4: Connect your Android smartphone and iPhone to the computer using a data cable.
- Step 5: Once the two devices have been recognized on the platform, set your Vivo V29 as the Source and your iPhone as the Target. Alternatively, click the Flip button to specify the direction of the transfer.

- Step 6: After that, choose the categories of the files you want to transfer. From there, click Contacts and then tap Start Transfer to proceed.

- Step 7: Wait while the data transfer is ongoing. Avoid using both your devices during the process to avoid unwanted disruptions.

- Step 8: After completing the process, click OK to wrap it up. Check your iPhone contacts afterward and find the newly imported contacts from your old Android phone.

Simple Reminders to Copy Contacts From Vivo V29 to iPhone Smoothly
It’s true to say that the five data transfer methods above are safe and effective. But generally speaking, we can’t deny that any process that involves the migration of data is sensitive in nature. That’s why it’s important to prepare both devices before officially initiating the data transfer process. Here are some reminders you need to keep in mind before you export contacts from Vivo V29 to iPhone.
- Make sure your iPhone is fully charged and carrying enough internal storage.
- Incoming phone calls might interrupt the data transfer process in some ways. Hence, it’s best to turn the Airplane mode on both devices while the contacts are being migrated.
- Don’t use both devices once the data transfer has started.
- Lastly, create a backup file for your contact list. You never know what’s going to happen with the transfer. It’s best to be prepared to avoid data loss. Don’t worry. Wondershare Dr.Fone has a file backup feature that can help you a lot.
Conclusion
Data transfer is a sensitive procedure. That’s why it’s highly recommended to opt for a conservative yet effective migration method to prevent serious issues. The five techniques above can surely help you copy contacts from Vivo V29 to iPhone 14 or any model. Just make sure to prepare your mobile devices beforehand and settle on the data transfer option suitable to your needs. For a more convenient phone transfer solution, install Wondershare Dr.Fone on your computer. It is equipped with data migration features that can help you export contacts from Vivo V29 to iPhone securely.
4 Ways to Transfer Music from Vivo V29 to iPhone
You switch from an Android device to an iPhone but can’t find an ideal solution to transfer music from Vivo V29 to iPhone.
Welcome to the club! A while back, I was facing the same issue as iOS devices come with numerous restrictions. Unlike an Android to Android transfer, it can be tough to move music from Android to a new iPhone , such as iPhone 13. Thankfully, I discovered some quick fixes for this problem, which I’m going to share with all of you right here. Read on and learn how to transfer music from Vivo V29 to iPhone in 4 surefire ways.
Part 1: How to transfer music from Vivo V29 to iPhone, including in 1 click?
Yes – you have read it right. You can learn how to send music from Vivo V29 to iPhone using Dr.Fone - Phone Transfer with just one click. This remarkable tool by Dr.Fone can help you switch from one device to another in a few minutes. A highly advanced tool, it supports data transfer between Android and iPhone, iPhone and iPhone, and Android and Android. Since a cross-platform data transfer is supported, you won’t face any trouble moving music from Vivo V29 to iPod, iPad, or iPhone.
Dr.Fone - Phone Transfer
Transfer music from Vivo V29 to iPhone in 1 Click!
- Easily transfer every type of data from Vivo V29 to iPhone, including music, videos, photos, messages, contacts, apps data, call logs, etc.
- Works perfectly with most smartphones and tablets, including Apple, Samsung, HTC, LG, Sony, Google, HUAWEI, Motorola, ZTE, Nokia, and more.
- Fully compatible with major network providers such as AT&T, T-mobile, Verizon & Sprint.
- Compatible with the latest mobile phone operating system, including iOS & Android.
- Fully compatible with the latest computer system Windows and Mac
3981454 people have downloaded it
A user-friendly tool is compatible with most Android and iOS devices. The desktop application is available for Windows and Mac, which comes with a free trial as well. Besides music, you can also move your contacts, messages, photos, call logs, and other important content. Follow the steps below to get started:
- Firstly, launch the Dr.Fone toolkit on your computer and go to the “Switch” option from its welcome screen.

Now, you need to connect two devices to the system. Once the Vivo V29 devices are detected, authenticate them and select the media transfer option.
Both of your devices will automatically be detected by the application. Ideally, your Vivo V29 will be listed as “Source” while the iPhone should be the “Destination” device. If not, you can click on the Flip button to interchange their positions.
Choose the data that you would like to transfer. To move music from Vivo V29 to iPhone, make sure the option of “Music” is enabled before clicking on the “Start Transfer” button.


- As Dr.Fone - Phone Transfer will move the selected data from Vivo V29 to iPhone, wait for a while. Once it is completed, you will be notified.

That’s it! With just one click, you can now move music from Vivo V29 to iPhone. After that, you can safely disconnect both of the Vivo V29 devices.
Part 2: How to transfer music from Vivo V29 to iPhone selectively?
Another user-friendly way to learn how to send music from Vivo V29 to iPhone is by using Dr.Fone - Phone Manager (Android) . A part of the Dr.Fone toolkit, it can be a complete Android device manager. You can transfer your data between Android and computer and from an Android to an iOS device. You can even move songs from your Vivo V29 to iTunes without using iTunes itself.
Dr.Fone - Phone Manager (Android)
Transfer Media from Vivo V29 to iPhone/iTunes
- Transfer contacts, music, messages, and more data between Android and computer.
- Manage, export & import the data easily.
- Transfer your data between iTunes & Android.
- Manage the data on your Vivo V29 on a computer.
- Compatible with the newest Android and iPhone.
3981454 people have downloaded it
Since it is a complete Android phone manager, you can use it to transfer all the other kinds of data (like photos, videos, contacts, messages, and more) from one source to another. Unlike Dr.Fone - Phone Transfer that moves all the music files at once, you can perform a selective data transfer. The interface will provide a preview of your data so that you can choose the files you wish to move. To learn how to transfer music from Vivo V29 to iPhone selectively, follow these steps:
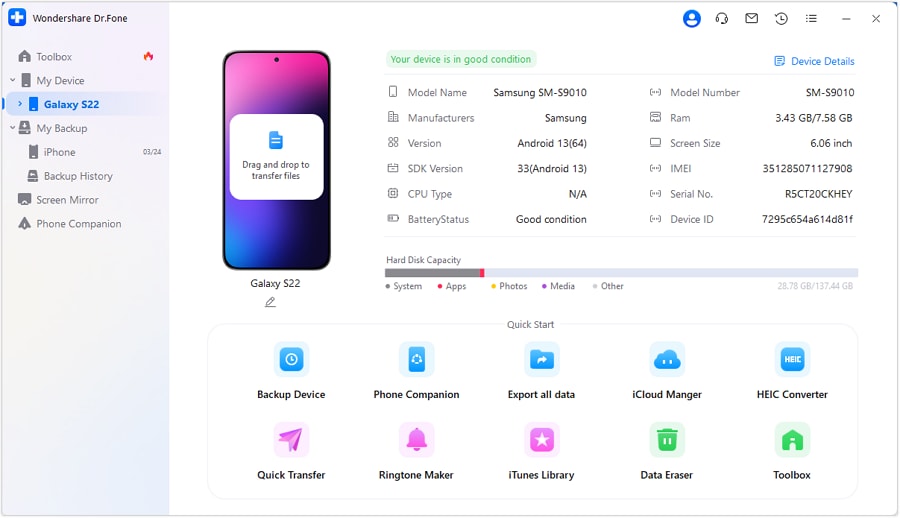
- Install and open the Dr.Fone toolkit on your computer and click on the “Phone Manager” option from the home screen.

- Connect both Android phones and iPhone to software and let them be detected automatically. From the top-left option, make sure you have selected your Vivo V29 as a default/source device. The interface will provide its snapshot with some shortcuts.
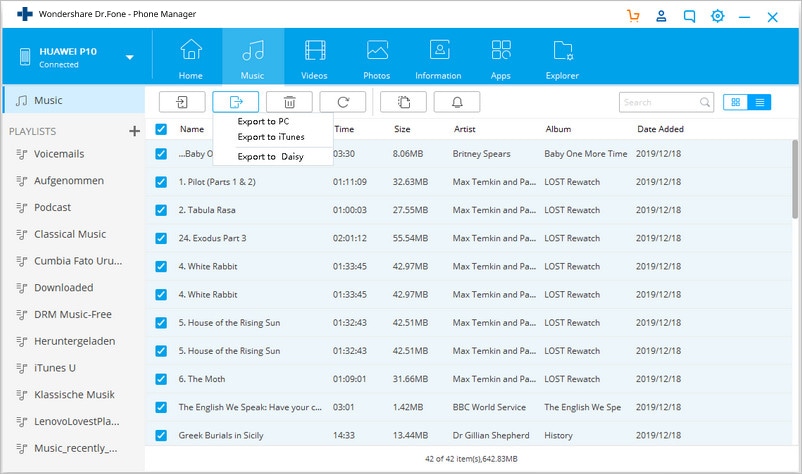
To manage the music files stored on the Android device, go to the “Music” tab on the interface. Here, you can view all music files, podcasts, audiobooks, songs, etc., listed in different categories.
Choose the files and then select the export button on the toolbar. From here, select the connected iPhone as a source.
Wait a moment and let the application automatically transfer your selected music files from your Vivo V29 to your iPhone.
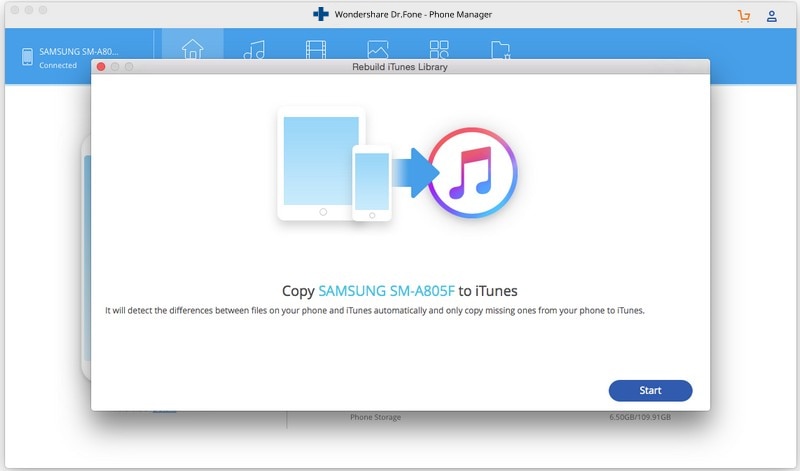
Besides performing a direct transfer of data from one smartphone to another, you can also use the application to transfer music from Vivo V29 to iTunes as well. To do this, you need to select the “Transfer Device Media to iTunes” option from its home page. This will launch a pop-up window and let you move your music files from the Android device to iTunes directly.
In this way, you can selectively transfer music from Vivo V29 to iPhone in a hassle-free manner.
Part 3: How to transfer music from Vivo V29 to iPhone using Android File Transfer?
If you use a Mac, then you can use Android File Transfer to move your data from your Vivo V29 to your system. Though, to transfer music from Vivo V29 to iPhone, you would later need to take the assistance of iTunes. This is because you can’t simply drag and drop your data from your system to the iPhone. While the solution is free, it is certainly quite complicated and is not direct like Dr.Fone.
To start with, download and install Android File Transfer from its official website on your Mac. It is compatible with macOS 10.7 and higher versions.
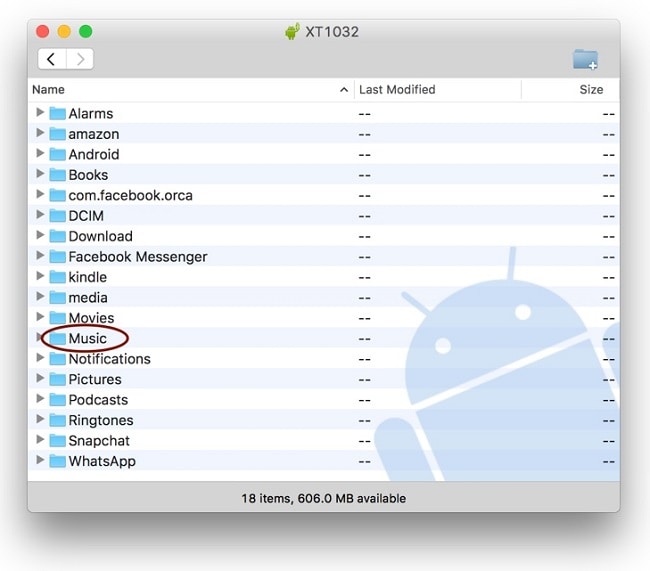
Now, connect your Vivo V29 to your Mac and launch Android File Transfer (if it won’t automatically launch already).
Go to the Music folder, copy your favorite songs, and save them to your Mac. After that, you can transfer music from your Vivo V29 to your Mac.
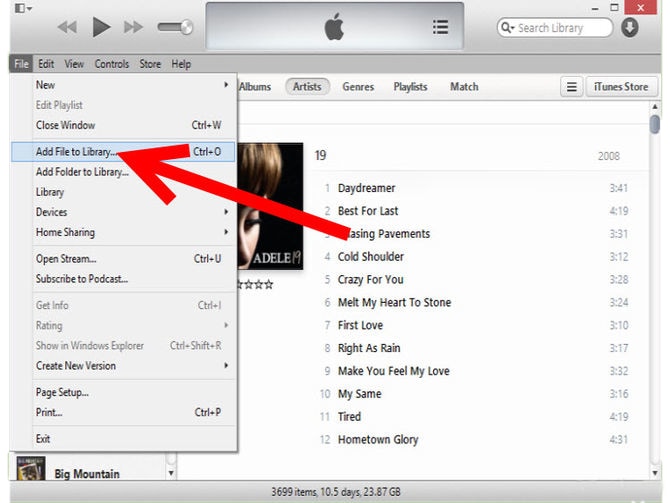
Great! You are halfway there. Launch iTunes on your Mac and add the newly transferred music to it. You can drag and drop it from the Finder to iTunes. Alternatively, you can also go to its options and click on “Add files to Library”. In this way, you can manually add new music to your iTunes library.
Once you have transferred the newly added music to iTunes, connect your target iPhone to the system, and let iTunes detect it automatically.
Select your iPhone from the Vivo V29 devices and go to its “Music” tab. From here, you can enable the “Sync Music” options. Select the playlists and songs you wish to move and click on the “Apply” button to initiate the process.

Needless to say, the process is a bit complicated. Furthermore, you might face some compatibility issues between your devices and iTunes as well. To avoid all this unwanted hassle, you can simply take Dr.Fone applications’ assistance and transfer music from Vivo V29 to iPhone effortlessly. In this way, you can learn how to send music from Vivo V29 to iPhone through iTunes and Android File Transfer.
Part 4: How to transfer streaming music from Vivo V29 to iPhone?
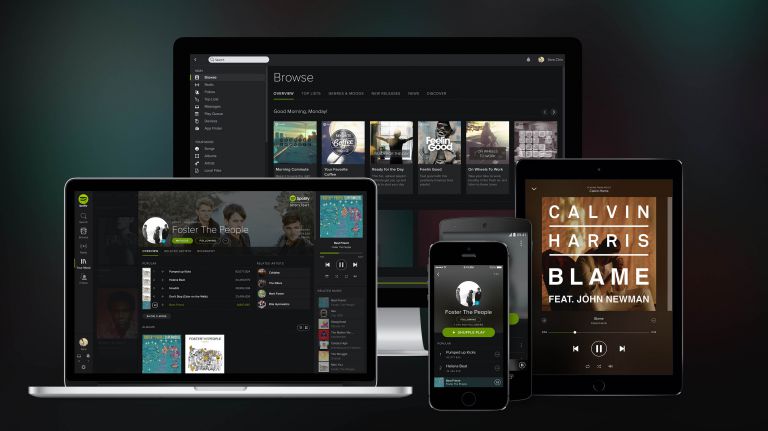
These days, many people use streaming services like Apple Music, Google Play Music, Spotify, etc., to listen to their favorite songs without the hassle of downloading them. The good thing about these streaming services is that you can access your music from multiple devices. For instance, let’s consider the example of Spotify.
Once you have created a playlist on your Spotify account, you can access it from any other device. You can even access your music by visiting its website because it will be stored on Spotify’s server and not your device itself.
If you are moving from an Android to an iPhone, you can follow these steps to ensure your Spotify music won’t be lost.
- Launch Spotify on your Vivo V29 and go to the Playlist tab. From here, you can create a playlist. Later, you can add your favorite songs to this playlist as well. You can even create multiple playlists on the app.

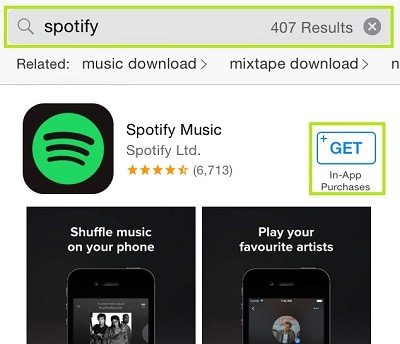
- Afterward, unlock your iPhone and go to the App store. Look for the music streaming app and download it on your phone.
- Once you log in to your Spotify account using your credentials, you can access “My Music” and access all your saved playlists.
The same drill can be followed for all the other streaming services as well. While you can sync your music using these streaming services, the songs you have made available offline will not be listed here. Therefore, you need to make sure that you have saved them in a playlist beforehand.
When you know how to move music from Vivo V29 to iPhone, you can easily make this transition. Go ahead and pick a preferred option to transfer music from Vivo V29 to iPhone. For a one-click transfer of data, you can use Dr.Fone - Phone Transfer , while to make a selective transfer, you can try Dr.Fone - Phone Manager (Android) . Both of these are user-friendly and reliable tools that will come handy to you on numerous occasions.
Tips of Transferring Messages from Vivo V29 to iPhone 14/15
Are you switching your phone to the latest iPhone 14 or 15 and wondering how to transfer your important text messages from your Vivo V29? Unlike transferring photos, moving texts poses a unique challenge as the options available are relatively limited.
Transferring your messages allows you to keep your important messages intact, preserving cherished conversations and important information. Be it a heartfelt message from a loved one or crucial details in a business conversation, some of your text messages must hold significant sentimental and practical value.
This article will guide you through effective and easy methods to transfer texts from Vivo V29 to iPhone. Let’s explore together the best ways to transfer texts and overcome the hurdles that come with this process.
When it comes to seamlessly transferring SMS from Vivo V29 to iPhone, Apple’s official app, “Move to iOS,” can be a reliable and straightforward solution. This app is designed to streamline the transfer process, allowing you to move not only your text messages but also other essential data to your iPhone.
To use this Move to iOS app, you need to download it from the Google Play Store first on your Vivo V29. Then, follow the steps to transfer SMS from Vivo V29 to iPhone here:
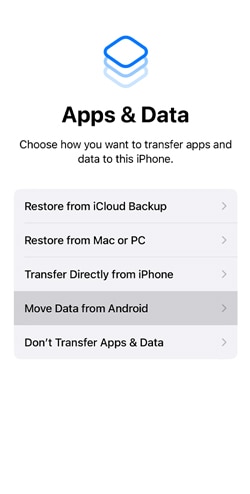
- Step 1: Setup your iPhone. Power up your new iPhone 14 or 15 and progress through the initial setup until you reach the “Apps & Data” screen. At this point, select the option that reads “Move Data from Android.”
- Step 2: Agree to Terms and Conditions. Open Move to iOS on your Vivo V29. Then, review and tap “Agree” to Terms and Conditions to proceed.
- Step 3: Enter the Code. On your Vivo V29, a screen will appear, requesting a 6–10-digit code. This code will be generated on your iPhone. Enter the displayed code on your Vivo V29 to make a secure connection between the two devices.
- Step 4: Select Content to Transfer. With the Vivo V29 devices now connected, you can choose the types of content you wish to transfer. Select “Text Messages” and any other data you want to move to your new iPhone. Tap “Continue” to initiate the transfer process.
**Tip:**Keep your devices close to each other and connected to power until the transfer process is completed.
- Step 5: Once the transfer is complete, you will be prompted to finish setting up your iPhone. Follow the instructions to complete the setup process, and you’re done.
How To Move Text Messages From Vivo V29 to iPhone Quickly with Computer
If you’re looking for a swift and reliable way to move text messages from Vivo V29 to iPhone, third-party software like Wondershare Dr.Fone can be the perfect go-to solution.
Packed with a user-friendly interface, this software streamlines the process, ensuring a quick and efficient transfer of your messages through its Phone Transfer feature. Dr.Fone Phone Transfer supports seamless data transfer between Android and iOS devices and vice versa. It also regularly updates so that compatibility won’t be an issue.
How to transfer texts from Vivo V29 to iPhone with Dr.Fone
- Step 1: Open Wondershare Dr.Fone from its official website , and find the phone transfer tool.


.
- Step 2: Specify the source and destination devices. After connecting to your devices, Dr.Fone will identify the connected devices and load their data onto the platform. Choose your Android as the Source device and your iPhone as the Destination device to set the transfer path. Use the Flip button if necessary to alter the transfer direction.
- Step 3: Choose text messages as data types for transfer. Proceed to select the types of data you wish to transfer. Checkmark the text messages category and click the Start Transfer button. If you want to remove existing data from the destination device, you can select “Clear data before copy.”
- Step 4: Monitor music transfer progress. The progress of the data transfer will be displayed in a pop-up window. Once completed, click OK to conclude the process.

Troubleshoot Why I Can’t Transfer Texts from Vivo V29 to iPhone
Even with the reliable methods mentioned earlier, there may be instances where you encounter difficulties in transferring texts from your Android to your iPhone. Don’t worry; we’ve got you covered with solutions to common issues that might hinder a smooth transfer.
- 1. Interrupted transfer
The transfer process may be interrupted if you use other apps, receive a phone call, or navigate away from the transfer screen on your Vivo V29 before it completes. So, make sure that both devices are left undisturbed until the transfer process is complete.
If you navigate away from the “Move to iOS” app on your Android or receive a phone call during the transfer, it may disrupt the process. Restart the transfer and keep both devices active until completion.
- 2. Problems with Wi-Fi connection
Wi-Fi connection issues on the Android device can hinder the transfer process. This may be caused by apps or settings affecting Wi-Fi, such as Sprint Connections Optimizer or the Smart Network Switch.
To address it, you can turn off apps or settings that might affect Wi-Fi on your Vivo V29, forget known Wi-Fi networks, and retry the transfer. It’s important to maintain a stable Wi-Fi connection on both devices throughout the transfer.
- 3. Partial content transfer or iOS device full message
Users may encounter situations where only some content is transferred, or the iOS device appears full despite an incomplete transfer. This can lead to potential data loss.
For this issue, you can consider erasing your iOS device and starting the transfer again. Make sure that the available space on your iPhone accommodates the Android content. Delete unnecessary data or apps on your iPhone to free up space if needed.
Bonus: How to Back Up Messages with Google Drive
In addition to seamless transfers between devices, backing up your text messages becomes equally important. Fortunately, Google Drive offers a convenient solution by allowing you to back up your messages with ease. Turning on backup on Google Drive ensures that your valuable SMS history remains safe and accessible whenever you need it.
- Step 1: Open your Vivo V29’s Settings. Start by opening your Android “Settings” and navigate to the “System,” “System & Updates,” or “About phone” section.
- Step 2: Select “Backup” or “Backup & Restore”. Within the “System” settings, look for the “Backup” or “Backup & Restore” option. Tap to access the backup settings for your device.
- Step 3: Choose a Google account. Under the backup settings, you’ll find the option to select the Google account to which you want to back up your data. Make sure that you are signed in with the Google account you want to use for the backup.
- Step 4: Turn on backup. Your phone will show you that turning on backup will include backing up your text messages. Tap “Turn on” to proceed with the backup.


Conclusion
Switching phones to the latest model is an exciting occurrence. However, the challenge of transferring crucial data, especially text messages, from an Android to a new iPhone can be challenging.
Fortunately, armed with the insights from this article, we’ve delved into two effective methods for seamlessly transferring text messages: using Apple’s official “Move to iOS” app and leveraging third-party software like Wondershare Dr.Fone. With these methods, you can bid farewell to any complications associated with message transfers.
- Title: In 2024, 5 Easy Ways to Copy Contacts from Vivo V29 to iPhone 14 and 15 | Dr.fone
- Author: Emma
- Created at : 2024-07-17 21:46:03
- Updated at : 2024-07-18 21:46:03
- Link: https://android-transfer.techidaily.com/in-2024-5-easy-ways-to-copy-contacts-from-vivo-v29-to-iphone-14-and-15-drfone-by-drfone-transfer-from-android-transfer-from-android/
- License: This work is licensed under CC BY-NC-SA 4.0.