In 2024, 5 Ways To Teach You To Transfer Files from Vivo V29 to Other Android Devices Easily | Dr.fone
5 Ways To Teach You To Transfer Files from Vivo V29 to Other Android Devices Easily
Transferring data from one phone to another when switching devices is a complex and tough task. The data stored in their old phone is one of the major reasons why people are hesitant to switch devices. However, it is only the case when you don’t know the right method. If you plan to switch to a new Android device, this article will help you transfer files from Vivo V29 to Other Android Devices.
There are multiple ways to transfer files from one Android to another, but we have chosen the easiest 5 methods in this article. Stick with the article to find different methods for Android-to-Android file transfer, along with their pro, cons, and best-case scenarios.
Part 1: Transfer Files Between Android via Bluetooth
When trying to transfer files between Android phones, Bluetooth is available as the in-built option. It is part of all Android devices, and you don’t need any internet, computer, or cable to use it. Although newer and faster transfer methods have overshadowed Bluetooth as a data transfer option, it is still among the reliable options.

Steps To Transfer Files via Bluetooth
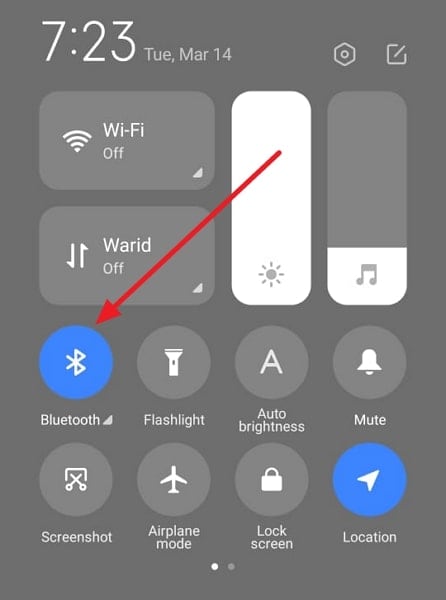
Step 1: Start by enabling Bluetooth on both Android devices and ensuring their visibility is set to all. Afterward, select the targeted files on the old Android phone.
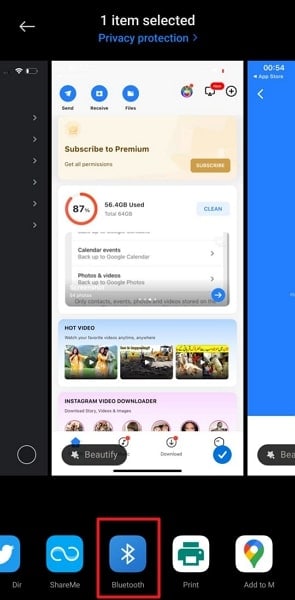
Step 2: Now, press the “Share” icon and select “Bluetooth.” Choose your new Android device from the available devices on the next screen.
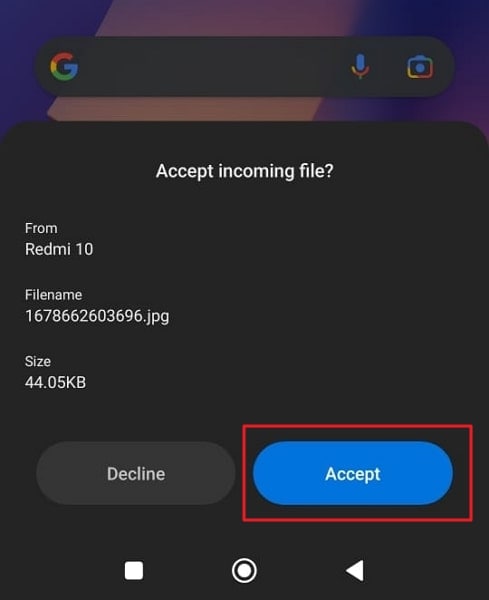
Step 3: Move to your new Android phone and hit “Accept” to start the transfer process. The transfer time will be depended on the size of the files.
Pros and Cons
| Pros | Cons |
|---|---|
| · It is an in-built option for all Android devices. | · It is an extremely slow method for transferring files |
| · You don’t need internet, cable, or Wi-Fi to send files via Bluetooth. | · If you send large files using this method, the process frequently fails, which can corrupt the files. |
| · Using Bluetooth doesn’t require any special knowledge or skills |
Best For
Using Bluetooth is best for transferring small to medium, size files. It is also convenient when you can’t access the internet.
Part 2: Transfer Files from Vivo V29 to Other Android Devices by Nearby Share
Nearby Share is a method developed by Google to share files between Android phones. It can be considered Google’s answer to Apple’s AirDrop, though, unlike AirDrop, it doesn’t require Wi-Fi. This method is available for all Android devices though you should use the latest Android OS for smoother working. Moreover, Bluetooth needs to be enabled to use this method.
Step-by-Step Guide To Transfer Files via Nearby Share
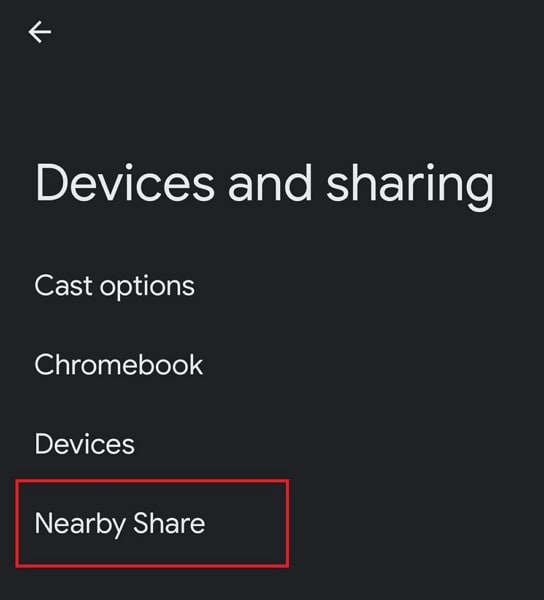
Step 1: You will need to activate “Nearby Share” on both devices first. To do that, go to the phone’s “Settings” and access the “Google” settings. Here, tap “Devices and Sharing,” and from the next appearing screen, choose “Nearby Share.”
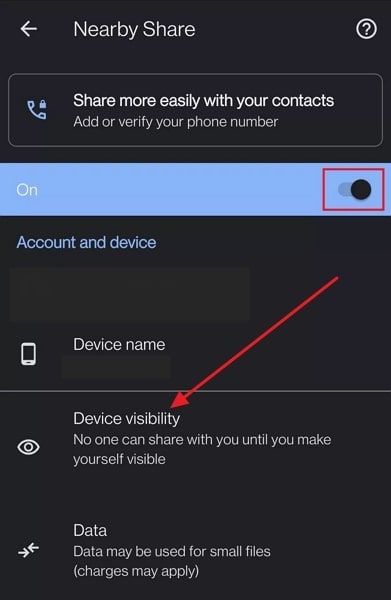
Step 2: In the “Nearby Share” screen, toggle it on and set device visibility to “Everyone.” Once you activate it on both Android devices, find and select the files you want to transfer on the old Android phone.

Step 3: After selecting the required files, press the “Share” button and select “Nearby Share” from the options. It will detect nearby devices and select your new Android device once it appears. A prompt will appear on both phones with a matching PIN. Accept the files on the new phone to start the transfer process.


Pros and Cons
| Pros | Cons |
|---|---|
| · It is a fast and secure way of transferring files between Android devices. | · You can only send limited types of files through this method. |
| · You do not need Wi-Fi to use this feature. | · This feature consumes a lot of battery if you use it for a long time or transfer large-size files. |
| · Nearby Share is available on a wide range of Android devices. |
Best For
Using Nearby Share is recommended when you don’t have access to a computer or the internet, and you need to share large files.
Part 3: Transfer Files Between Android by USB Cable
If you have access to a computer, you can use it to transfer files from Vivo V29 to Other Android Devices. All you need is a USB cable, and you are set. In this method, you will first copy data from the old phone to the computer and then copy it to the new phone from the computer. It works by default on Windows, but for Mac, you need Android File Transfer.
Instructions To Transfer Files by USB Cable
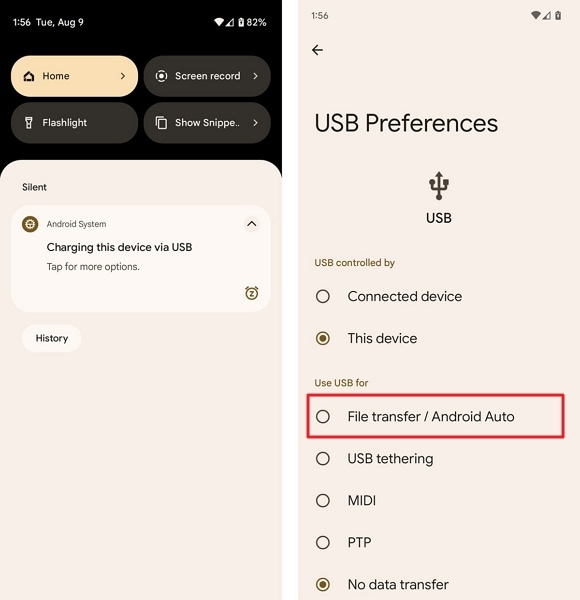
Step 1: First, connect your old Android phone to your computer using a USB cable. A prompt will appear on your asking for the USB purpose. Here, select “File Transfer/Android Auto.” It will give your computer access to the phone data.
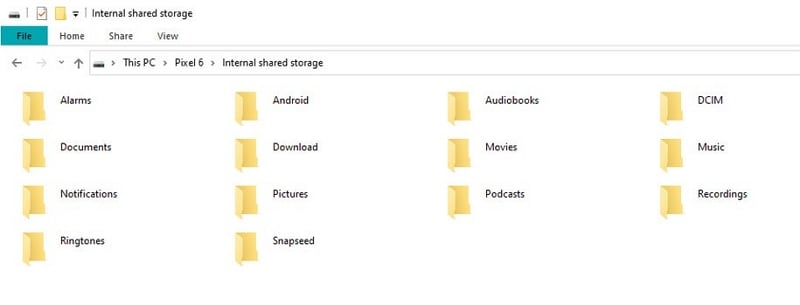
Step 2: Now copy all the data you want to transfer to your computer and disconnect the old device. Afterward, connect the new Android device to the computer, give access permission, and copy the data you took from the old phone to the new phone.
Pros and Cons
| Pros | Cons |
|---|---|
| · You do not need to use any third-party app for this method | · This method can be time-consuming as you need to transfer the same data two times. |
| · It is a reliable and secure method. | · It only works well on Windows; on Mac, it becomes a hassle. |
| · Only a USB cable is needed to transfer the data. |
Best For
Using a USB cable is best for transferring data when you have large files and don’t have any better options.
Part 4: Sync Files from Vivo V29 to Other Android Devices With Google Account
Google Account is another great way for Android-to-Android file transfer if you haven’t set up the new phone yet. It allows you to back up all your data on the old device and restore it to the new Android device. With this method, you can transfer most of the data from the old phone, including settings, contacts, notes, etc.
Step-by-Step Guide To Transfer Files With Google Account
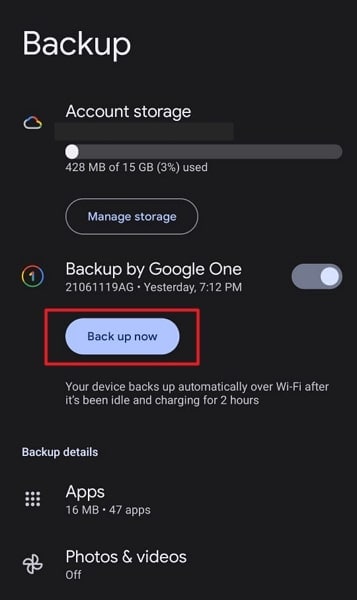
Step 1: On your old Android device, go to “Settings” and tap “Google.” In the Google settings, select “Backup” and tap “Backup Now” to back up your phone. Once the backup is complete, move to the new device.
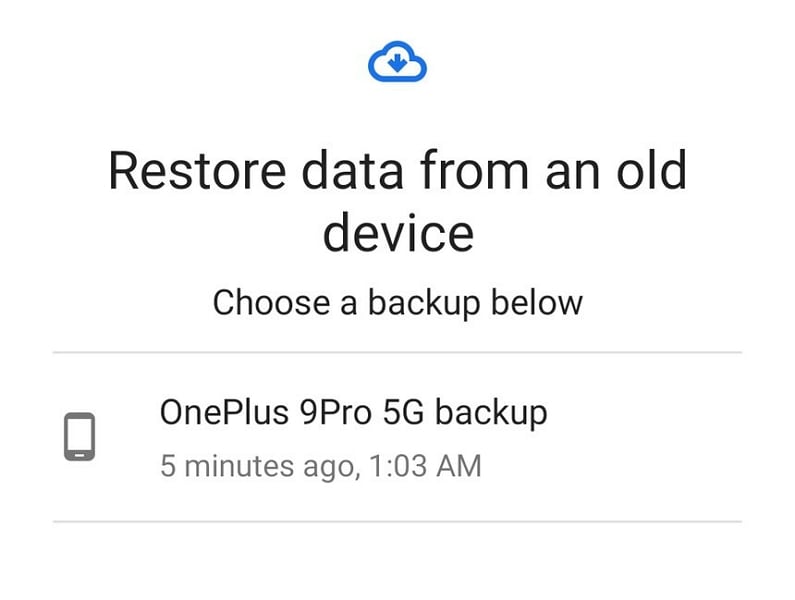
Step 2: When setting up the new Android device, sign in using the same Google Account. Afterward, select “Restore from Google Backup” when the option appears to restore the backup from the old phone.
Pros and Cons
| Pros | Cons |
|---|---|
| · It can transfer most of the phone data to the new Android phone. | · If your old device data is larger than 15GB, then you have to buy the storage because Google only provides 15GB free storage. |
| · Using Google Account is also secure, as your backup is encrypted. | · It requires you to use the same Google Account on both devices. |
| · The devices don’t need to be near each other. |
Best For
Using Google Account to transfer files from Vivo V29 to Other Android Devices is best when you still haven’t set up the new Android device.
Part 5: Best choice: The Fastest Way to Transfer Files from Vivo V29 to Other Android Devices with Dr.Fone
Want to find the best and fast way to transfer files from Vivo V29 to Other Android Devices? If you don’t want to go through any time-consuming or complex transfer process, we recommend you use Wondershare Dr.Fone. It is a complete toolbox for smartphones and includes all the necessary solutions. Regarding Android data transfer, it can quickly transfer data between 8000+ Android devices, including the latest ones.
Key Features of Dr.Fone
- Using the Dr.Fone app, you can transfer data to Android devices with the latest Android 13 OS.
- This tool allows you to transfer, back up, and restore your entire WhatsApp data from chats to emojis to locations.
- If you have lost your phone data, you can recover it back using the Dr.Fone app safely and quickly.
- With this tool, you can also repair system issues in your device in a secure environment.
Steps To Transfer Files from Vivo V29 to Other Android Devices With Dr.Fone
Aside from being the fastest way to transfer files between Android phones, it also has the simplest transfer process. You only need Dr.Fone installed on your system and a couple of USB cables to use this method. Here is how you can transfer files from phone to phone via Dr.Fone:
Step 1: Establish the Connection Between Android Devices
Use USB cables to connect both Android devices to the computer and launch Dr.Fone app. From the “Home” screen, click “Phone Transfer” and wait for the program to assign devices to the correct positions.

Step 2: Assign Android Devices to their Correct Positions
For transferring data from the old Android device to the new one, the old device should be at the “Source” position and the new device at the “Destination” position. If the positions assigned by the program are incorrect, use the “Flip” button to correct them.

Step 3: Select the Desired Data and Complete the Transfer Process
Now select the data you want to transfer and click “Start Transfer” to begin the transfer process. In case you want to delete data on the new device, select “Clear Data before Copy” before pressing “Start Transfer.”

Pros and Cons
| Pros | Cons |
|---|---|
| · It can transfer over 15 types of data from one phone to another. | · You will need a computer to transfer data through Dr.Fone |
| · The transfer process of this method is extremely fast and gets completed within minutes. | · It also needs USB cables to connect your Vivo V29s. |
| · You do not need the internet to use this method. |
Best For
It is best for all sorts of data transfer situations. Whether you are transferring a few files or moving all the data, it is a perfect tool.
Conclusion
To summarize, while it may seem troublesome to transfer files from Vivo V29 to Other Android Devices, in reality, it isn’t. This has been well demonstrated through the article using 5 of the easiest transfer methods. It includes methods suited for a few files, like Bluetooth, to the best method of using Dr.Fone. With Dr.Fone, you can transfer all types of data from Vivo V29 to Other Android Devices in the shortest time possible.
How to Use Phone Clone to Migrate Your Vivo V29 Data?
Dr.Fone - Phone Transfer
Best Tool to Migrate Huawei Phone Data
- Transfers any data between devices.
- Supports all phone models like iPhone, Samsung, Huawei, LG, Moto, etc.
- 2-3x faster transfer process compared to other transfer tools.
- Data kept absolutely secure during the transfer.

The rapid change in the mobile models has made it difficult for us to keep up with the trend. For some, while it might be a matter of owing only the best mobile, for others it’s a matter of enjoying the best of the world at each point of time. Thereby they try to keep up with the mobile trend by getting their hands on the latest mobile whenever possible whether iOS or Android. In such a scenario it becomes difficult to transfer data from one to another. But here is some mobile technology such as Phone Clone that will change it forever. So, let us see how you can use it to your advantage to transfer your valuable information.
Before we move on to see how to transfer data we will first see why someone would like to migrate the information from old phone to new phone:
- - To replace the old phone with a new phone as the primary phone
- - To back up all the info in both the phone
Moving on, in the subsequent section, we will understand how to use Phone Clone Vivo.

Part 1: How to use Phone Clone for Android?
Android has been ruling the world with its open-source technology and compatibility for a wide range of devices. As a result of which, many companies are producing the latest technology in hardware without any worry of OS support. Android phone makers such as Huawei, Samsung, HTC, and many others are at the trend of releasing flagship models at the different budget range on a regular interval. As a result, this has made people run like fans for grabbing a hand on the latest rig, to enjoy the best of the world at every point in time. In such a scenario, it becomes difficult to transfer your data from one phone to another securely. Well in this part, we will be introduced to the Huawei Phone Clone app that will help you to migrate information from one phone to another.
Here are the steps to be followed for Phone Clone Vivo to transfer your data from one phone to another:
1. First, install the app on both the phones, i.e., on both old and new mobiles
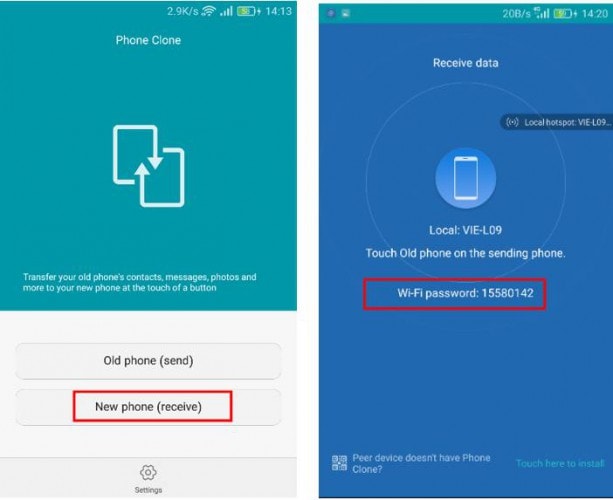
2. Open the app on the new phone. Click on the new phone button. A Wi-Fi will be created whose password will be displayed at the time of creation. You will need that password in the next step.
3. Open the app on the old phone. Click on the old phone button. Select the wi-fi network created in the 2nd step and enter the password that you received in the 2nd step.
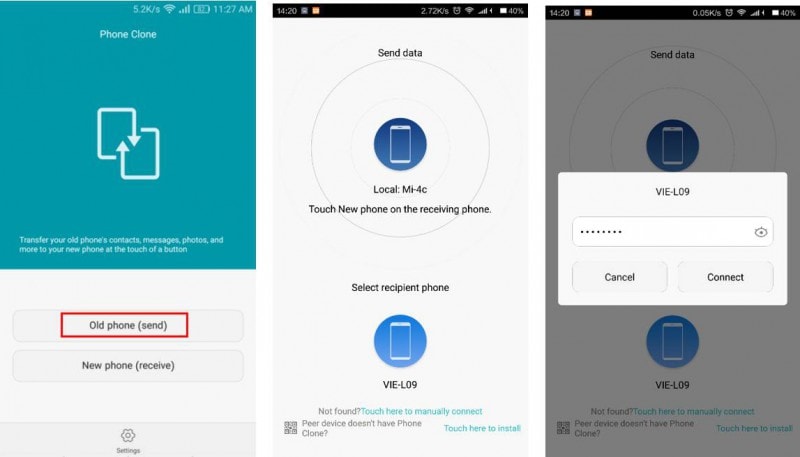
4. Once connected, click the number of tabs on the old phone that you want to send to a new phone.
Part 2: How to use Phone Clone for iPhone
The best part of the Huawei Phone Clone is that it supports not only Android but it also supports the iPhone. All the things that you can do while transferring data from one Android to another, you can achieve the same feat while transferring data from one iPhone to another iPhone. It is especially useful when you get that big update to your iPhone version, and most of the apps get useless due to the drastic hardware and software change in old and new iPhones. Thinking about changing your old iPhone to a new one could have been disastrous if not catastrophic if personal data could not have been transferable from one mobile to another. Phone Clone by Huawei lets you simply achieve the task while at the same time saving you a lot of data and time
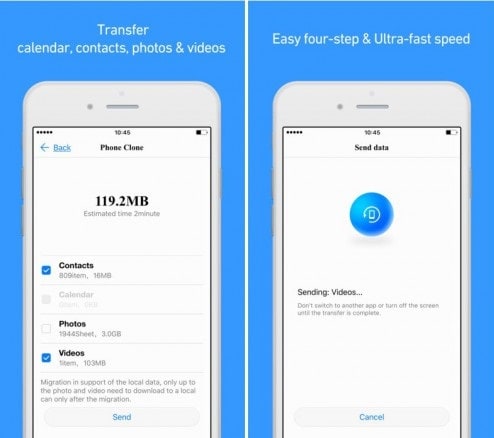
Now, let us take a look at how you can use Phone Clone Vivo app without spending a penny on expensive services and with 4 simple steps:
1. Install the Phone Clone app on old and new iPhone mobile
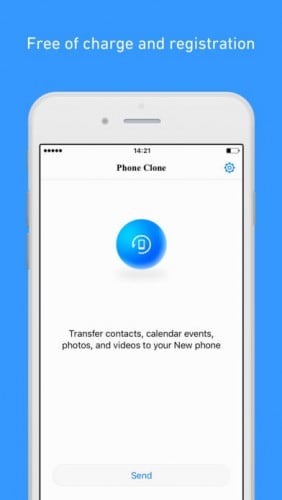
2. Open the app for the new iPhone. Click on the send button. A Wi-Fi hotspot will be created, displaying its name and password.
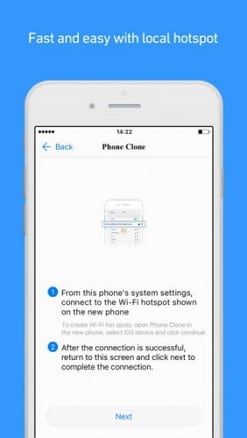
3. Go to the wi-fi setting of the old iPhone and connect to the Wifi network mentioned in step 2. Open the app on the old iPhone and click on next to complete the connection.
4. Once connected, click on the tabs presented in the old iPhone and select the tab that you want to send to the new iPhone.
Part 3: Best Phone Clone alternative: Dr.Fone - Phone Transfer to migrate iPhone/Android data
While Phone Clone is free of cost and is a great emergency there is still much lagging in the app. It does not connect properly; it sometimes fails to send files completely and many more. To overcome we have with you the best Huawei Phone Clone alternative, called Dr.Fone - Phone Transfer , the easiest way to migrate iPhone/Android data.
Dr.Fone provides one of the best options to switch personal data from one phone to another seamlessly. It supports mobile of all kinds of data and service carriers, so you are not restricted to any particular type of mobile set or carrier service. Enjoy the freedom of information transfer without any loss in security and fast process.
Some of the pros of Dr.Fone - Phone Transfer are as follows:
Dr.Fone - Phone Transfer
1-Click Phone-to-Phone Transfer
- Easy, fast, and safe.
- Move data between devices with different operating systems, i.e. iOS to Android.
- Supports iOS devices that run the latest iOS version
- Transfer photos, text messages, contacts, notes, and many other file types.
- Supports over 8000+ Android devices. Works for all models of iPhone, iPad, and iPod.

3981454 people have downloaded it
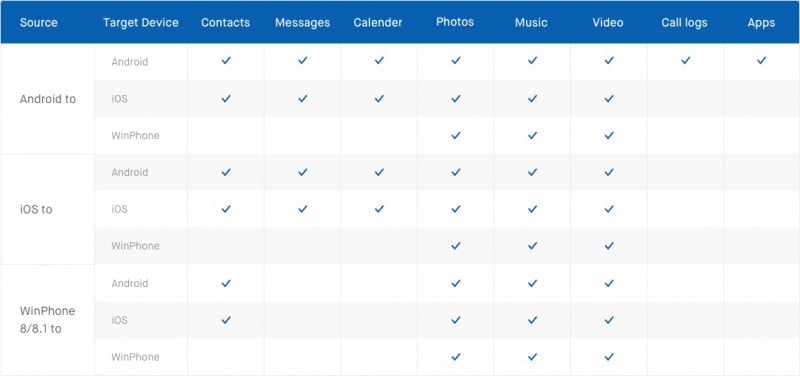
Here is a small comparison of how data transfer from one platform to another platform fares in Dr.Fone
Now let us take a look at how to use Dr. Fone to transfer data between mobiles:
1. Launch the Dr.Fone app on the computer and select Phone Transfer.
2. Connect both the mobile to the computer and select the send and receive side on the computer
3. Select the files and then click on “Start transfer” to complete the transfer process

The best part of Dr.Fone is that you can try it free of cost to check if it suits your requirements. We are sure that its jaw-dropping feature will leave an impression on your mind.
We hope that you learned some of the phone clone methods and applications that you can use to transfer your information from an old phone to a new phone. Use the methods mentioned above and be sure that you are on the safer and faster side of transferring data.
How to Transfer Contacts from Vivo V29 to Outlook
I would like to export/edit my contacts that are on My Vivo V29 and get them onto my computer for a back, to edit them, to input/import them into Outlook. Can this be done and how? Is there something I can download or a backup assistant?
With lots of contacts on your Vivo V29, you may want to transfer these contacts from Vivo V29 to Outlook for backup. This way, when you get a new Android phone or when you lose contacts by accident, you can quickly get them back.
To sync Android to Outlook, I highly recommend an Android manager: Dr.Fone - Phone Manager (Android) . This program empowers you to transfer contacts on your Vivo V29 to Outlook 2003/2007/2010/2013 easily and effortlessly.
Dr.Fone - Phone Manager (Android)
One Stop Solution to Transfer Contacts from Vivo V29 to Outlook
- Transfer files between Android and computer, including contacts, photos, music, SMS, and more.
- Manage, export/import your music, photos, videos, contacts, SMS, Apps etc.
- Transfer iTunes to Android (vice versa).
- Manage your Vivo V29 on computer.
- Fully compatible with Android 8.0.
4,858,377 people have downloaded it
How to sync Android with Outlook?
Now, I’d like to introduce you how to transfer Android contacts to Outlook. Download this free trial version on your computer. Then check out the easy steps below.
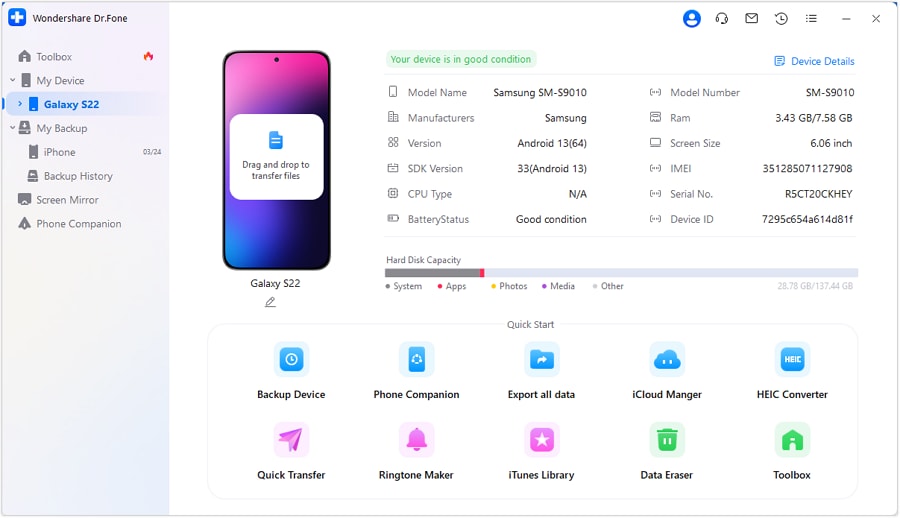
Step 1. Connect Android phone with a computer and run Dr.Fone
To start with, connect your Vivo V29 with a computer either via a USB cable. Run Dr.Fone on your computer and choose Transfer fron the main window Then, your Vivo V29 will be detected instantly. After that, the primary window will appears like the screenshot shows below.
Step 2. Android to Outlook sync
Then, click “Contacts” under “Information” panel on the top. In the contact management window, choose the contacts that you want to export. Click “Export” button. When the drop-down menu pops up, you can either click “Export selected contacts to computer” or “Export all contacts to computer”. After that, click “to Outlook Express” or “to Outlook 2003/2007/2010/2013”. Then, the contract transferring begins. Be sure your Vivo V29 is connected all the time.
As you see, apart from exporting Android contacts to Outlook, you can also copy contacts from Vivo V29 to vCard, Windows Live Mail and Windows Address Book. If you have a Gmail account, you’re able to export Android contacts to your computer, and then backup these Android contacts to your Gmail account too.

Now, download Dr.Fone - Phone Manager (Android) to have a try!
- Title: In 2024, 5 Ways To Teach You To Transfer Files from Vivo V29 to Other Android Devices Easily | Dr.fone
- Author: Emma
- Created at : 2024-07-17 22:11:22
- Updated at : 2024-07-18 22:11:22
- Link: https://android-transfer.techidaily.com/in-2024-5-ways-to-teach-you-to-transfer-files-from-vivo-v29-to-other-android-devices-easily-drfone-by-drfone-transfer-from-android-transfer-from-android/
- License: This work is licensed under CC BY-NC-SA 4.0.