In 2024, 5 Ways to Transfer Music from Lava Yuva 3 to Other Android Devices Easily | Dr.fone
5 Ways to Transfer Music from Lava Yuva 3 to Other Android Devices Easily
There can be many reasons to transfer music from Lava Yuva 3 to Other Android Devices, such as the change of the Lava Yuva 3 device since you bought a new one or want to keep music readily available on multiple devices. Therefore, if you face a dilemma over how to transfer music from one Android device to another, this is the right article for you.
So, keep reading to know about five different ways that will help you transfer your music files easily.

Part 1: How to transfer music from Lava Yuva 3 to Other Android Devices in 1 click?
The transfer of all music files from one Android phone to another with a single click of the mouse has never been easier. The switch feature on Dr.Fone - Phone Transfer program has made this action a lot simpler and even faster to transfer music from Lava Yuva 3 to Other Android Devices. It can also transfer other file formats such as other multimedia files, contacts, text messages, call logs, including apps and app data files.
### Dr.Fone - Phone TransferTransfer Music from Lava Yuva 3 to Other Android Devices in 1 Click Directly!
- Easily transfer every type of data from Lava Yuva 3 to Other Android Devices, including apps, music, videos, photos, contacts, messages, apps data, call logs, etc.
- Works directly and transfer data between two cross-operating system devices in real-time.
- Works perfectly with Apple, Samsung, HTC, LG, Sony, Google, HUAWEI, Motorola, ZTE, Nokia, and more smartphones and tablets.
- Fully compatible with major providers like AT&T, Verizon, Sprint, and T-Mobile.
- Fully compatible with iOS 16 and Android 13
- Fully compatible with the latest Windows or Mac version.
3981454 people have downloaded it
Here are the few simple steps required to be carefully followed to transfer music from Lava Yuva 3 to Other Android Devices.
Step 1. The first step is to download the Dr.Fone software from its official website and then run the installer wizard. Once the installation is complete, launch the program.

Step 2. Now, connect both the Android phones via a good USB cable to the PC. Thereafter, go to the Dr.Fone program’s main interface and click on the “Switch” button. You will see the two devices connected with the Source device on the left and the Destination device on the right on the next screen.
If you want the Source device to be the Destination device, click on the “Flip” button at the center of the screen.


Step 3. You can now select the files to be transferred by checking the corresponding boxes. In this case, check the Music box and then click on “Start Transfer” to transfer music from Lava Yuva 3 to Other Android Devices.
You should now see your music files being transferred with the overall progress displayed on a dialogue box.
There you go; within a few seconds, your music files will be transferred successfully.
Part 2. How to Transfer Music from Lava Yuva 3 to Other Android Devices Selectively?
Another way to transfer music from Lava Yuva 3 to Other Android Devices is by using the transfer feature on Dr.Fone - Phone Manager (Android) . As the name implies, this feature can be used to transfer files from one Android device to another by selecting the particular music file one by one instead of choosing an entire music file.
Dr.Fone - Phone Manager (Android)
Transfer Android Media to Android Devices Selectively
- Transfer files between Android and iOS, including contacts, photos, music, SMS, and more.
- Manage, export/import your music, photos, videos, contacts, SMS, Apps, etc.
- Transfer iTunes to Android (vice versa).
- Manage your iOS/Android device on the computer.
- Fully compatible with the latest iOS and Android version.
3981454 people have downloaded it
Here are a few easy steps to follow on how to transfer music from Lava Yuva 3 to Other Android Devices.
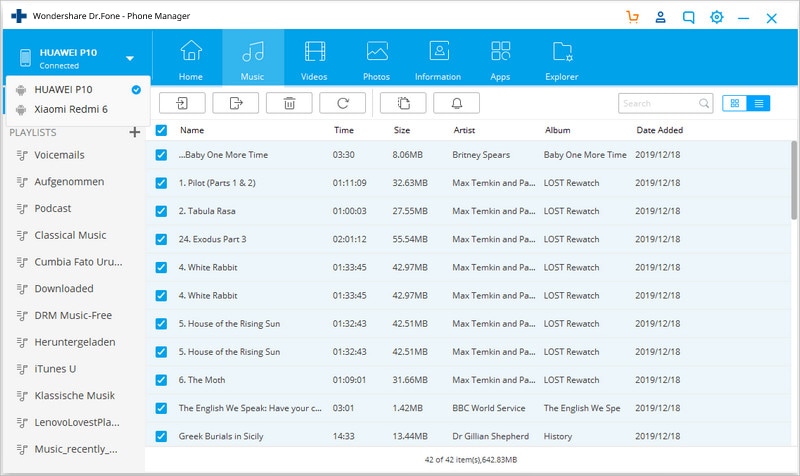
Step 1: After installing Dr.Fone software on your computer and launching it, connect the Android device via USB cable. Now click on the “Music” tab at the top of the screen amongst the other listed options. The program would immediately recognize your device.
Step 2. The moment all the audio files or music files on the connected device are displayed on the Dr.Fone software screen. You can scroll down and select each file you wish to copy or select an entire folder from the left side pane.
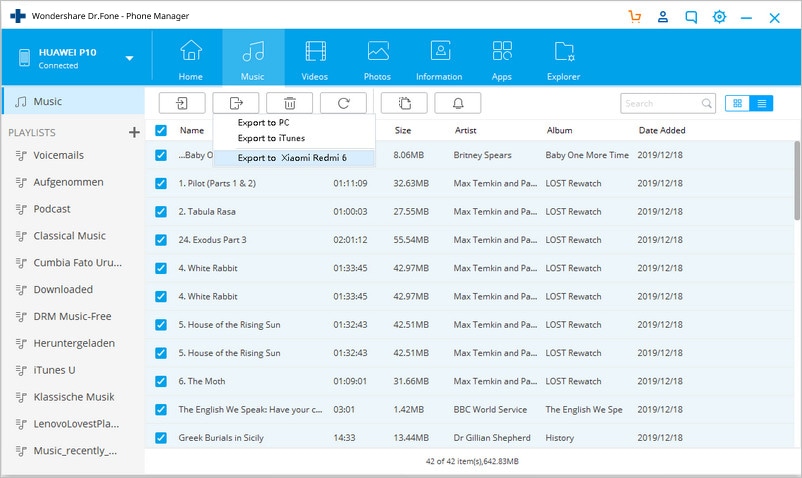
Step 3. After selecting the music files, you wish to copy, click on the “Export” button on the app and then select “Export to Device”. You will see the other device connected; there, click on the Lava Yuva 3 device’s name to begin the transfer process.
Part 3. How to transfer music from Lava Yuva 3 to Other Android Devices using Bluetooth?
Bluetooth transfer is one of the oldest methods that can be used to transfer music from Lava Yuva 3 to Other Android Devices, and it is a simple way to make use of it.
Here are the steps to follow to know how to transfer music from Lava Yuva 3 to Other Android Devices.
Step 1. There are two ways you can turn on Bluetooth on your Lava Yuva 3
Method 1: The first method is to swipe from top to down on your Lava Yuva 3 to view the swipe menu on some Android OS. You would be able to view and immediately turn on Bluetooth with a single click.
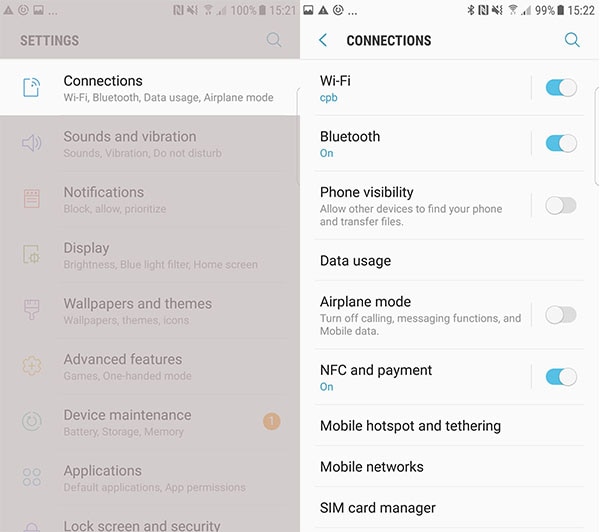
Method 2: Go to “Connection” from the Settings Menu on your Lava Yuva 3, and then in the Connections options, you will see “Bluetooth”. Make sure it is switched on. Also, ensure that the phone’s Bluetooth visibility is enabled so that your device can be seen and easily paired with the other device.
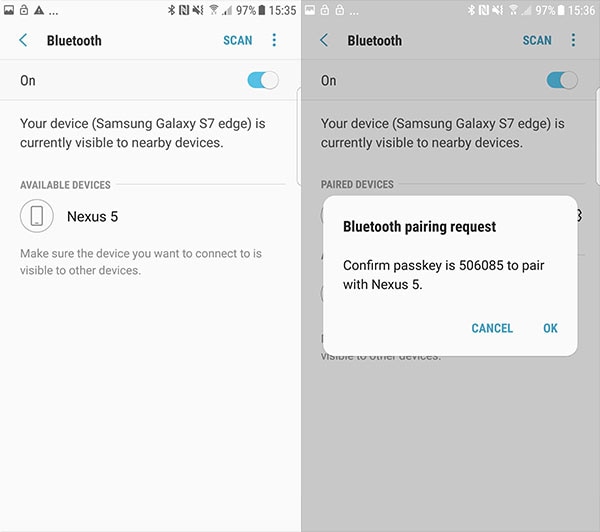
Step 2. Now, switch on the Bluetooth for the destination device as well. Once done, search for your device’s Bluetooth name on the phone and click to pair both Bluetooth devices together.
Mostly, you will be provided with a pair confirmation code that will be displayed on both devices. Click OK to pair both devices successfully.
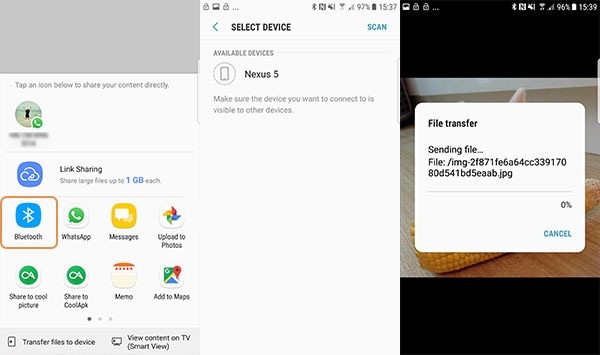
Step 3. The final step is to head to the File Manager app on your phone or go to your Music Player, select the music file you wish to transfer, and then click on your device’s Share button or logo.
Here, scroll until you see the “Bluetooth” option. You will be immediately prompted to select the Lava Yuva 3 device to share with, click the earlier paired device name, and then click on “Accept” on the other device.
This is how you can transfer music files from Lava Yuva 3 to Other Android Devices using Bluetooth.
Part 4. How to transfer music from Lava Yuva 3 to Other Android Devices using NFC?
NFC or Near Field Communication is another wireless means to transfer music from Lava Yuva 3 to Other Android Devices. Although, unlike Bluetooth, this method requires contact between the two devices making the transfer.
Below are the steps on how to transfer music from Lava Yuva 3 to Other Android Devices using NFC.
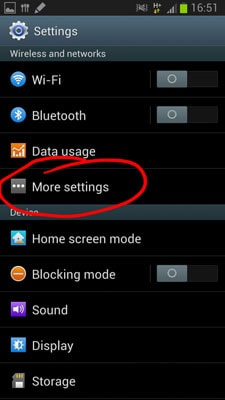
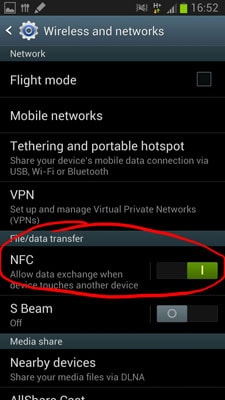
Step 1. First, enable NFC connection on both the Lava Yuva 3 devices between which you want to transfer the music files. To switch on NFC on Android, go to Phone’s “Settings” and click on “More Settings” under “Wireless and Network” options. Now click on the NFC button to ensure that it is switched On. Do the same on the other Android device as well.
Step 2. Before you begin to transfer, you need to touch the back of both devices (whose NFC has already been turned on), you will notice that both devices vibrate upon a successful connection. This means you can now start transferring your music files.

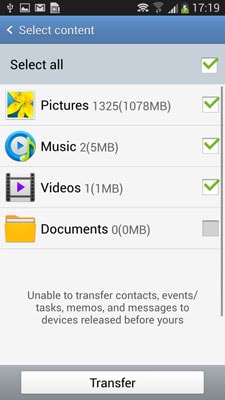
Step 3. After connecting both the Lava Yuva 3 devices, you will be provided with media options of files that can be transferred. In this case, select the Music files and then click on “Transfer” to send the music files via NFC.
Part 5. How to transfer music from Lava Yuva 3 to Other Android Devices using Google Play Music?
Google Play Music is a free Music streaming service provided by Google and available for all users with a Google account. Follow these steps to transfer music files to an Android phone using Google play.
Note: You need a Google account to be able to make use of this service
Step 1. Open Google Play Music on your computer and sign in with your already existing Google account details (Same as on 1st Android Device).
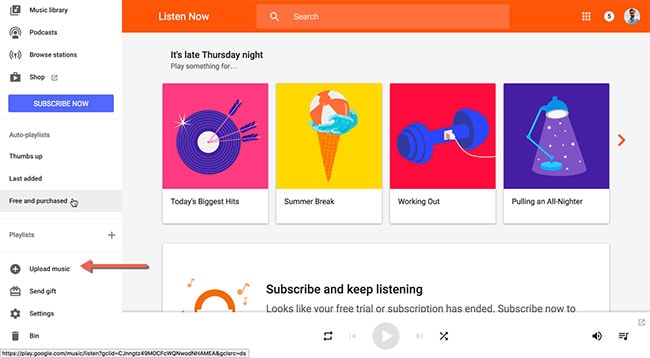
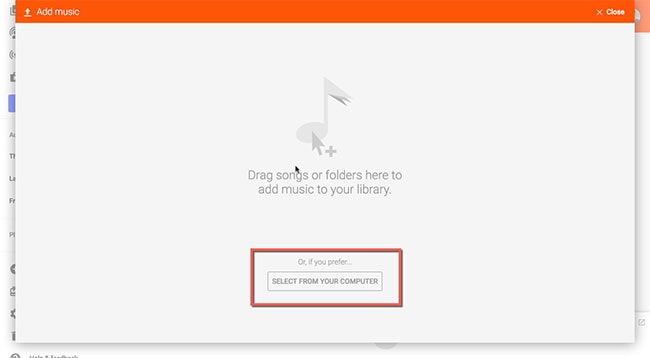
Step 2. You can now upload music files by clicking on the Upload button at the left corner of the screen to view the main Panel of the page. At the bottom of the page, click on “Select From Your Computer” to upload music files from your computer to Google Play.
Step 3. After the upload has been completed, download the “Google Play Music” app on your other Android phone and then log in to the app with the same Google credentials. You will see all the recently uploaded tracks on your Google Play account. You can now stream or download them easily.
At last, we hope that you now know how to transfer music from Lava Yuva 3 to Other Android Devices devices safely and securely through the above article. In fact, you have got two very good options to perform the transfer in the form of Dr.Fone - Phone Transfer and Dr.Fone - Phone Manager (Android) . Well, choose the most convenient one for you and make sure that you proceed with the guided steps mentioned for each way.
2 Ways to Transfer Text Messages from Lava Yuva 3 to iPhone 15/14/13/12/11/X/8/
The biggest dilemma that people face when they buy a new iPhone like iPhone 14/14 Pro (Max) is how to transfer data from the Android or old iPhone. Well, transferring images, audio, videos, etc. is easy as there are lots of apps available that allow doing so.
Aside from this, it is also important that they can transfer messages and contacts to their new phone like iPhone 14/14 Pro (Max). But the process of how to transfer text messages from Lava Yuva 3 to iPhone can get a little more tricky than transferring other data. But don’t worry, as there are some ways available that allow easy transferring of messages from Lava Yuva 3 to iPhone.

Part 1: One-click solution to transfer text messages from Lava Yuva 3 to iPhone
Buying a new iPhone like iPhone 14/14 Pro (Max) is a lot easier than setting it up. Media files like music, images, and video clips are a lot easier to transfer cross-platform. But the part of migrating contacts and text messages especially gets tricky cross-platform due to poor compatibility between Android and iPhone. Though is possible to transfer text messages from android to iPhone, the process can be slower and will need several workarounds than normal.
Want to transfer Android data to the new iPhone 14/13/12/11/X/8 faster and securely? Then one-click transfer solution - Dr.Fone - Phone Transfer can help in the task. It is a powerful transfer tool that lets users transfer messages from android to iPhone real quick and without any risk. It can transfer not only text messages, but also contacts, music, images, videos, and others. With Dr.Fone - Phone Transfer, one can easily transfer phone data from an android, iOS, Symbian, etc. to other Android or iOS devices. You don’t need to install any app on the sending and receiving devices. Just connect the Lava Yuva 3 devices with a USB cable simultaneously and you can transfer data between them very carefully.
Dr.Fone - Phone Transfer
Transfer Text Messages from Lava Yuva 3 to iPhone like iPhone 15/14/14 Pro (Max)
- Easy, fast, and safe.
- Move data between devices with different operating systems, i.e iOS to Android.
- Supports iOS devices that run the latest iOS version
- Transfer photos, text messages, contacts, notes, and many other file types.
- Supports over 8000+ Android devices.
- Works for all models of iPhone, iPad, and iPod.

4,053,382 people have downloaded it
How to transfer SMS from Lava Yuva 3 to iPhone using Dr.Fone - Phone Transfer?
Using Dr.Fone, it is possible to transfer SMS from Lava Yuva 3 to iPhone in a matter of seconds. This one-click method of transferring text messages is way faster and simple than other transfer methods. Follow the steps to learn how to transfer text messages from Lava Yuva 3 to iPhone with Dr.Fone - Phone Transfer:
Step 1: Download the Dr.Fone toolkit and install it on the Windows or Mac computer. Launch the toolkit by double-clicking on the desktop shortcut or from the application directory.
Step 2: Then connect both the Lava Yuva 3 devices i.e. Android and iPhone to the computer with the help of USB cables. Wait for them to be detected by the software.
Step 3: Click on the Switch option on the Dr.Fone utility home screen and it will take you to Dr.Fone - Phone Transfer interface.
Step 4: Both the Android and iPhone will be displayed on the next screen. Select the Android device as the Source and iPhone as the destination using the Flip button.
Step 5: Now, select the data that you want to transfer by checking the respective option. In this case, only check the Text messages checkbox and uncheck everything else.
Step 6: Finally hit the “Start Transfer” button and it will begin to transfer text messages from Lava Yuva 3 to iPhone.
Dr.Fone - Phone Transfer offers a safe and quick way to transfer messages from Lava Yuva 3 to iPhone like iPhone 14/14 Pro (Max). Moreover, it can work both on new and old target iPhone. Dr.Fone - Phone Transfer is also compatible with a variety of iOS devices and iOS versions, so it doesn’t have any restrictions for transferring data.
Part 2: Transfer SMS from Lava Yuva 3 to iPhone using Move to iOS app
Transferring text messages from Lava Yuva 3 to iPhone using Dr.Fone - Phone Transfer is the best and the fastest way. But it requires a computer and physically connecting the Lava Yuva 3 devices via USB cables. What if the person doesn’t have a computer? They won’t be able to transfer any data from their old Android to a new iPhone like iPhone 14/14 Pro (Max). If you want to find another way to transfer messages and other stuff from Lava Yuva 3 to iPhone, then Move to the iOS app can help in this task.
Move to iOS is an Android app developed to make it easier to transfer data from Lava Yuva 3 to iOS devices. It is available for free at Google Play Store and is of the minuscule size of approximately 2.2 MB. One doesn’t need to wait extreme time to install the app. With Move to iOS, you will be able to set up the iOS device easily without needing to connect it with a USB cable. But there are some prerequisites that you have to fulfill before you can transfer data from Lava Yuva 3 to iPhone 14/14 Pro (Max) or an earlier model-
- • The iPhone must have iOS 9/10/11/12/13/14/15/16/17
- • iPhone 5 or later is required
- • Android 4.0 and above
- • The iPhone hasn’t been set up yet or the data has been erased
- • Data doesn’t exceed the storage on iPhone
- • Steady Wi-Fi network is available
How to transfer text messages from Android and iPhone using Move to iOS?
Want to learn how to transfer messages from android to iPhone without USB cables and computers? With the below steps, you can easily transfer messages and other data from Lava Yuva 3 to iPhone like iPhone 14/14 Pro (Max) using Move to iOS -
Step 1: Click on the “Move Data from Android” button on the “Apps and Data” screen during the iPhone setup process. If you have already set up the Lava Yuva 3 device, then you need to erase the data from Settings > General > Reset and then go to Apps and Data screen.

Step 2: On the iPhone, click “Continue” on the Move from Android screen. It will generate the 6-digit or 10-digit code.
Step 3: Now on the Android device, download and install the Move to iOS app and open it.
Step 4: Tap on “Continue” and then “Agree” on the terms and conditions screen and then “Next” on the “Find Your Code” screen.
Step 5: Enter the code generated on the iPhone in the “Enter Code” screen.

Step 6: On the Transfer Data screen, select the content to transfer and click “Next”. It will start the transfer process and will take some time to complete depending on the size of the data.

Step 7: After transferring is complete, finish the iPhone device setup process.
The disadvantage that this method has is that you can’t transfer messages from Lava Yuva 3 to iPhone on an already set up iPhone. It only works on a new device or has to erase the data on the target device. Moreover, as it only works with all versions of iOS, the older devices can’t transfer messages through this method. They can use Dr.Fone - Phone Transfer for the task.
Best 3 Software to Transfer Files to/from Your Lava Yuva 3 via a USB Cable
If you are worried about deleting important information from your Lava Yuva 3, you may wish to simply transfer it up to your computer to keep it. Or you may simply want to transfer the photos from your day at the beach onto your computer.
However, due to the open nature of the Google Android operating system, there are several software available that aim to help you manage your Lava Yuva 3 through your computer. In this article, we will look at some of the best Android software management software available. Note that all the software enables you to connect Android to PC for file transfer , as well as allowing the selection of specific files onto your computer. But, some are better than other.
Wondershare Dr.Fone
Wondershare Dr.Fone
One-Stop Solution for Android USB File Transfer
- Transfer files between Android and computer, including contacts, photos, music, SMS, and more.
- Manage, export/import your music, photos, videos, contacts, SMS, Apps, etc.
- Easily integrate the entire iTunes library with a click.
- Work much faster and incredibly stable.
- Transfer iTunes to Android (and vice versa).
- Manage your Lava Yuva 3 on your computer.
- Fully compatible with the latest Android version.
4,761,338 people have downloaded it
Refer to the following guide for Android USB file transfer:
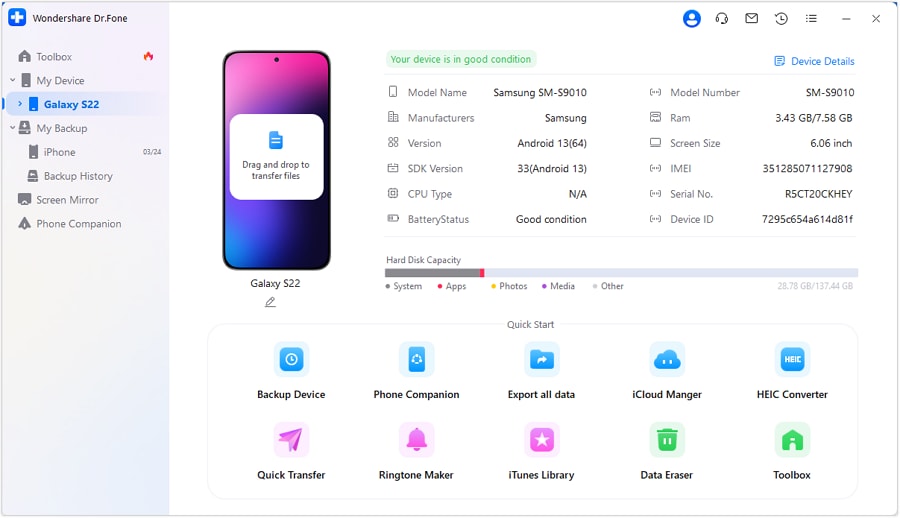
Step 1. Download Dr.Fone and install it on your computer. Connect your Lava Yuva 3 to your PC with USB Cable. Notice how it displays the same image that is on the screen of your device.

Step 2. Click on your Lava Yuva 3, such as Galaxy S22 > Export All Data among other options. The following main interface for Wondershare Dr.Fone will be displayed.
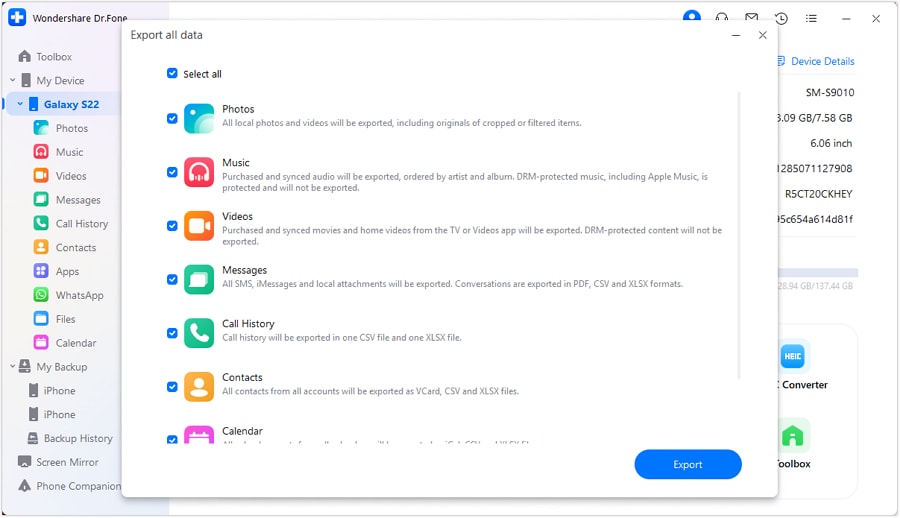
Step 3. You can select the file type you want to transfer to the computer or select all file types. Then, click “Export”. Wait for the transfer process to complete.

Video Guide: How to Achieve Android USB File Transfer with PC?
Wondershare Dr.Fone also features other helpful tools, such as the De-Duplicate option, which automatically scans all your contacts for any repetitions, which is always a nuisance (you often end up with duplicate contacts if you sync your contacts with Facebook, as well as already having them on your device, for example).
Mobogenie Android USB File Transfer
Advantages:
- Uninstall stock apps in batches.
- Easy-to-use interface.
- Easily download and manage apps.
- Easily transfer multiple files from your PC to your Android, and vice versa.
- Free of charge.
Disadvantages:
- USB only.
- Only connect one Android device at a time.
- Does not have integrated music sharing.
Overview:
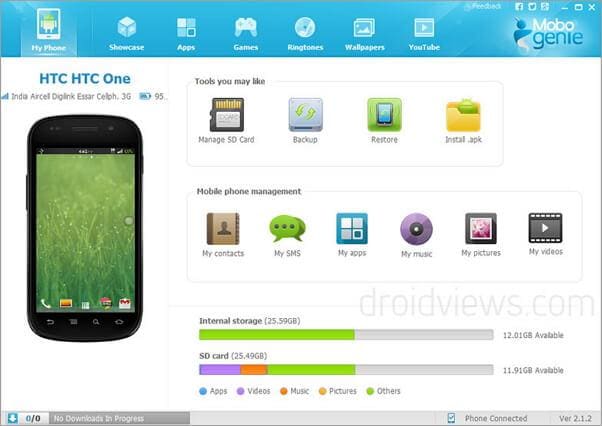
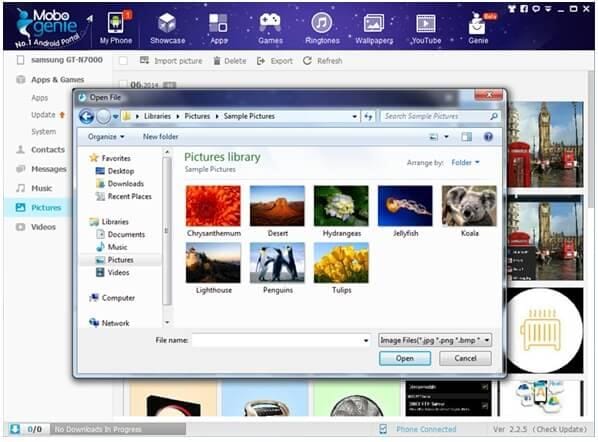
Download Mobogenie and run it, and connect your Lava Yuva 3 to the computer. Once your device has been connected, you will be prompted to install the driver for your device so that the application is automatically downloaded onto it. Once you have completed this process, you will be taken to the home screen:
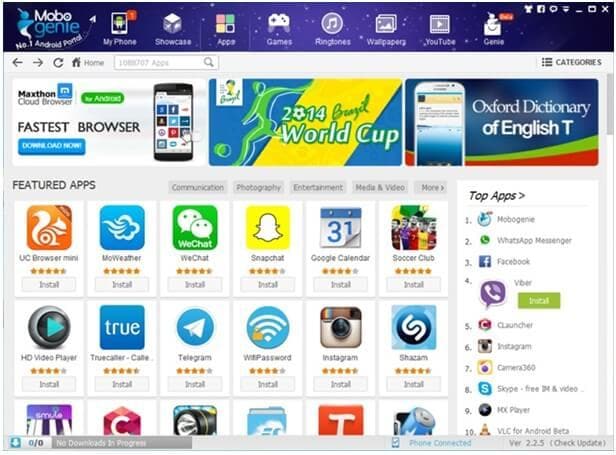
As with other data management software, you can download and install apps onto your Lava Yuva 3 from your PC. The advantage of this is that apps can be downloaded quickly, and also without costing you in terms of data roaming charges.
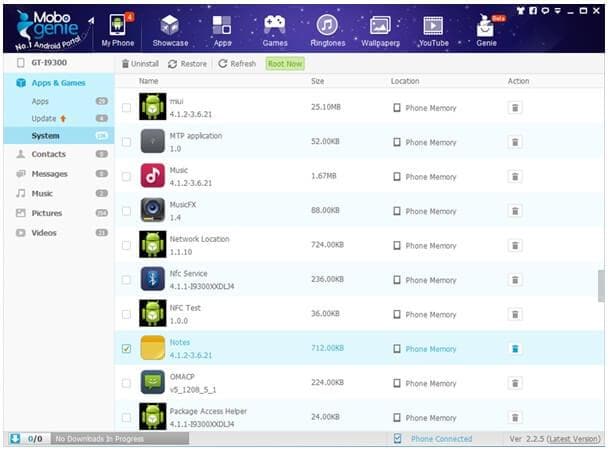
A neat feature is the ability to uninstall apps that came preloaded on the phone as often we find ourselves with apps that we never use that we cannot delete.
The transfer of photo files is straightforward, and several photos can be selected from your computer to import onto your device at once, or vice versa.
Features:
- Free.
- Support wireless connection of devices on the same network (although temperamental).
- Support multiple devices.
- Download apps onto it through app store.
- Simple to use.
Overview:
Download MoboRobo and install this Android USB file transfer tool on your computer. Upon opening it, you will be prompted to connect your Lava Yuva 3 with a USB cable or over WiFi, and then once connected, you will be asked permission to install the app on your Lava Yuva 3 as well.
Once connected, you will be brought to this home page, notice the options to use different devices as well as connected through Wi-Fi.
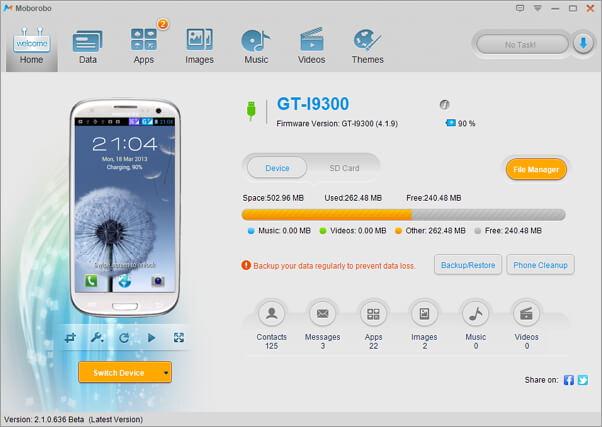
As with Mobogenie, once you are on the software, it is fairly easy to navigate around, and you can do everything from sending SMS from your PC to transferring apps and contacts. However, a drawback is that the management of your music requires you to have all your MP3 files on your PC and move them on to the software- not extremely inconvenient, but as we will see much easier solutions exist.
We recommend the use of Wondershare Dr.Fone, as it is more reliable and provides a simple user-friendly interface that allows you to manage your Lava Yuva 3 with ease. You can also transfer files between Android and Mac easily.
- Title: In 2024, 5 Ways to Transfer Music from Lava Yuva 3 to Other Android Devices Easily | Dr.fone
- Author: Emma
- Created at : 2024-07-17 22:14:59
- Updated at : 2024-07-18 22:14:59
- Link: https://android-transfer.techidaily.com/in-2024-5-ways-to-transfer-music-from-lava-yuva-3-to-other-android-devices-easily-drfone-by-drfone-transfer-from-android-transfer-from-android/
- License: This work is licensed under CC BY-NC-SA 4.0.