
In 2024, How to Migrate Android Data From Poco X5 to New Android Phone? | Dr.fone
How to Migrate Android Data From Poco X5 to New Android Phone?
While getting a brand new smartphone is certainly exciting, the process of phone migration is pretty tiresome. Too many times, users spend a lot of time and efforts to migrate Android to a new smartphone. If you wish to Android migrate to new phone without experiencing any data loss then you can take the assistance of a dedicated tool. There are plenty of ways to migrate Android to Android. In this guide, we will teach you how to migrate Android in three different ways.

Part 1: How to migrate Android using Google Drive?
Since Google Drive is already available on all the Poco X5 devices, it can readily be used to migrate Android to Android without much trouble. Firstly, you need to sync your data from the source device and later log-in to the same account to sync your new phone with the Drive. To perform phone migration using Google Drive, follow these steps:
1. To start with, go to Settings > Backup & Reset on the source device and turn on the option of “Backup my Data”.
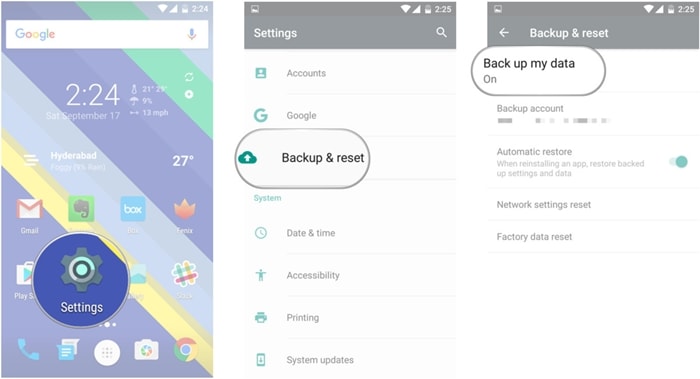
2. Furthermore, you can select the kind of data you wish to sync with your Google Drive. You can simply turn on the feature for Automatic backup to make the most of the space on Google Drive.
3. Wait for a while as your device will backup its content on the Drive. You can even go to your account’s Drive to view the backup.
4. Now, in order to Android migrate to new phone, simply turn on the target device and proceed to perform its setup.
5. Agree to the terms and conditions and sign-in to your Google account. Make sure this is the same account that is linked to your source device.

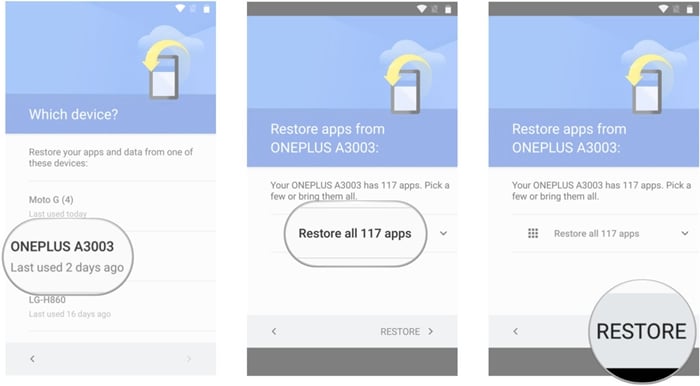
6. As you would sign-in to the account, it will display a list of available backup files. Simply select the recent backup file.
7. Furthermore, you can pick the apps that you wish to restore from here or restore all content at once.
8. To migrate Android to Android, just click on the “Restore” button and move your data from your old to new device.
Part 2: How to migrate Android data using Dr.Fone - Phone Transfer?
One of the most secure and fastest ways to migrate Android device to another phone is by using Dr.Fone Switch . Compatible with all the major Android, iOS, and Windows devices, it can easily be used to perform phone migration between different platforms. The tool performs a direct phone to phone transfer. It can Android migrate to new phone all kinds of data like contacts, call logs, bookmarks, messages, photos, videos, music, and more. To migrate Android to Android with no data loss, perform these steps:
Dr.Fone - Phone Transfer
Migrate Android Data to New Android Phone in 1 Click.
- Easy, fast, and safe.
- Move data between devices with different operating systems, i.e iOS to Android.
- Supports iOS devices that run the latest iOS
- Transfer photos, text messages, contacts, notes, and many other file types.
- Supports over 8000+ Android devices. Works for all models of iPhone, iPad and iPod.

3981454 people have downloaded it
1. Firstly, download Dr.Fone - Phone Transfer on your Windows PC or Mac from its official website. In order to perform Android phone migration, connect your old and new device to the system and wait for them to be detected.
2. Launch Dr.Fone toolkit and select the option of “Switch” from the welcome screen. Make sure that both the Poco X5 devices are connected to your system in a secure way.

3. This will provide the following interface. As you can see, Dr.Fone will intuitively detect the source and the target device. Though, you can click on the “Flip” button to interchange the position of the Poco X5 devices as well.

4. Select the kind of data you wish to move from the source to the destination device. You can even erase all the content on the target device by selecting the “Clear data before copy” option.
5. After selecting the type of data you wish to move, click on the “Start Transfer” button. This will initiate the phone migration process by moving your selected content to the target device.
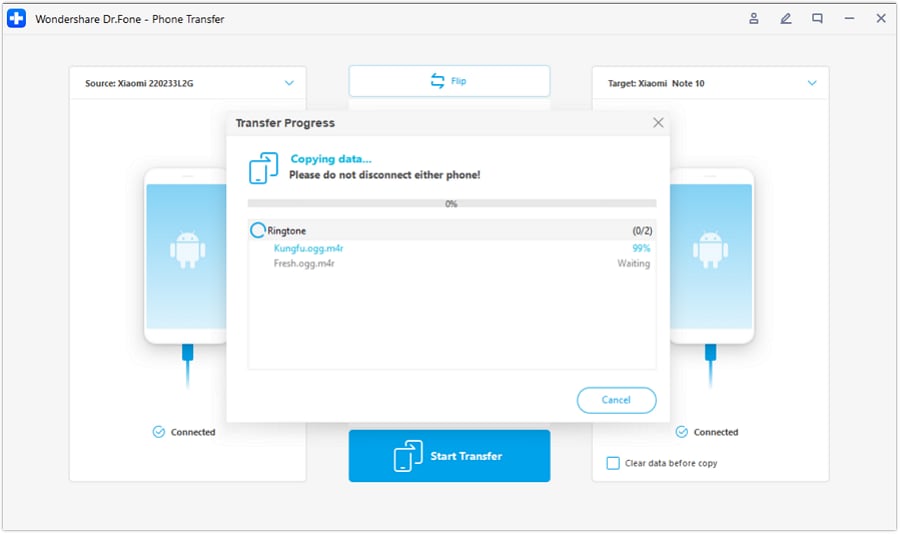
6. Wait for a while as Dr.Fone will migrate Android device to any other phone. Don’t close this window or disconnect the Poco X5 device during this stage.
7. Once your Android migrate to new phone, you will be notified by displaying the following prompt.
That’s it! After following these steps, you would be able to migrate Android to Android easily. Just disconnect your Poco X5s safely and use them the way you like.
Part 3: How to migrate Android data manually?
By using Dr.Fone Switch or Google Drive, you would be able to perform phone migration in an effortless manner. Nevertheless, if there is no free space on your Drive and you wish to manually migrate Android, then you can also make it work. Following are certain ways to migrate Android to Android using different tools and techniques.
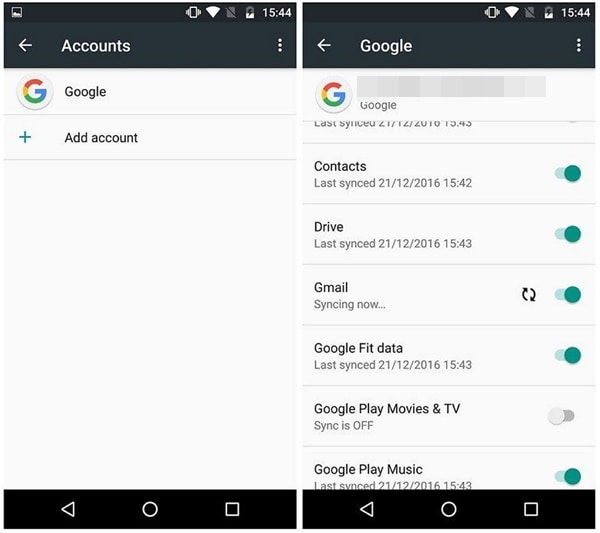
Contacts, Gmail, Fit Data, Play Store, etc.
To migrate Android device’s crucial content like its contacts, Google Fit data, Google Play Store data, Music data, etc. you can go to the respective Account and turn on the sync option. Later, you can use the same account and sync these files to the new device.
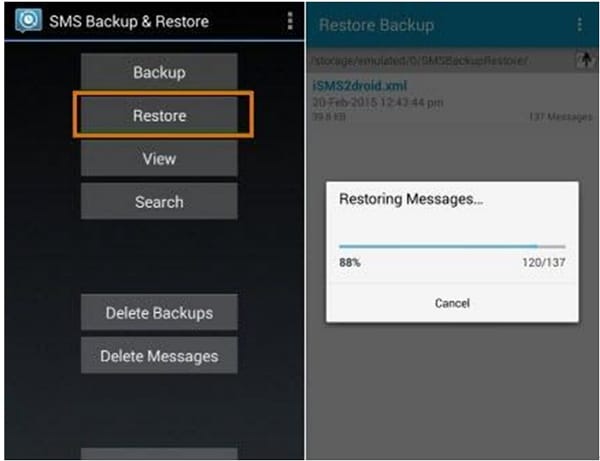
SMS transfer
There are plenty of ways to move your messages from one device to another. Just download a reliable SMS Backup & Restore app from Google Play store and sync your messages. Install the app on the new device to complete phone migration.
SMS Backup & Restore Download URL: https://play.google.com/store/apps/details?id=com.riteshsahu.SMSBackupRestore&hl=en
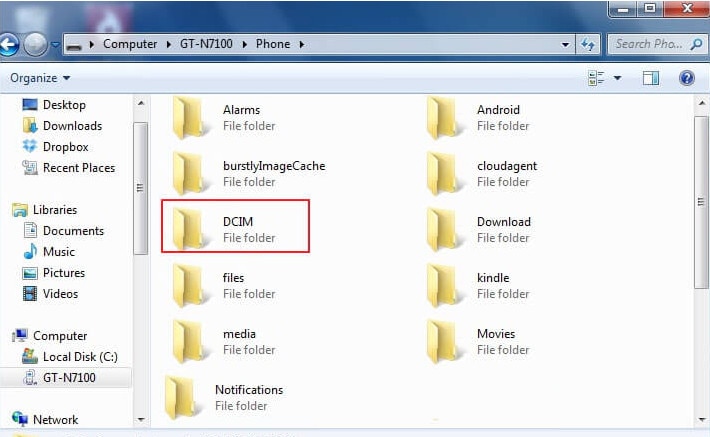
Media content
The smartest way to Android migrate to new phone your media files (like photos, videos, music, etc.) is by syncing them with Google Drive. If your Drive has limited free space, then you need to manually transfer this data. Connect your device to your system and open its storage. From here, you can manually copy the files having your media content and paste them to a safe location (or directly to the new device’s storage).
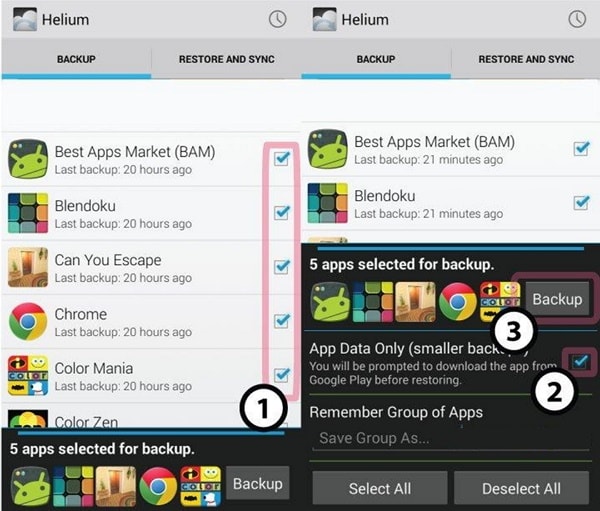
Transfer apps
You can also move your important apps while performing phone migration. There are dedicated third-party solutions that you can use for this. For instance, Helium can help you move your important apps and app data from one device to another.
Helium Download URL: https://play.google.com/store/apps/details?id=com.koushikdutta.backup&hl=en

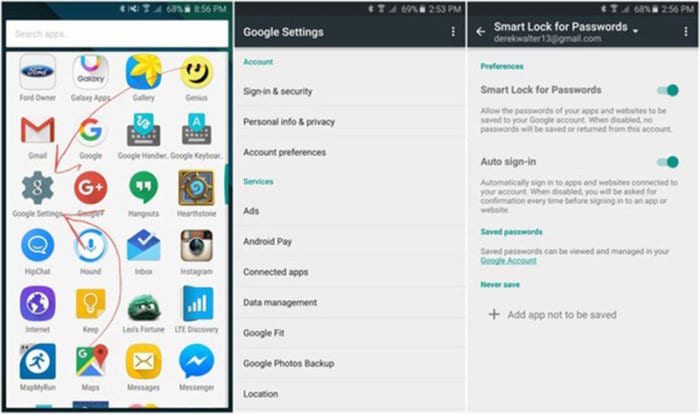
Bookmarks and passwords
If you use Google Chrome to store your passwords and bookmarks, then you can also migrate Android this content. Just go to Google Settings on the Poco X5 device and turn on the option of “Smart Lock for Passwords”. In this way, you won’t have to enter your passwords over and over again.
As you can see, the manual phone migration method will consume a lot of time and effort of yours. Therefore, we recommend using Dr.Fone Switch to migrate Android to Android without any data loss. It is a highly secure and reliable tool that will let you migrate Android to any other platform without any hassle.
How to Transfer Photos from Poco X5 to Laptop Without USB
Moving your photos on a computer comes with lots of benefits. Among them is the larger screen itself, which allows you to inspect the image details in a more thorough manner. Another thing is that the computer also serves as a great backup storage for your dearly cherished photos. You can be sure that the image folders you create in the computer’s local memory are highly secure. Just organize each file with labels to avoid unnecessary confusion. Simply put, our computers have a lot to offer with regard to file organization and data management.
Many people assume that copying your files to a computer is a bit of a hassle. Well, it’s somewhat true unless you’re going to opt for wireless data transfer. Yes. That’s possible. There are many tutorials out there on how to copy files from your phone to your laptop without USB. Simply choose a particular method that works best in your situation.
In this article, we will provide a short guide on how to organize your computer files easily and quickly. We will also list down a few tutorials on how to transfer photos from your phone to your laptop without USB. Continue reading below to learn more.
How to Organize the Photos on Your Computer
While smartphones offer convenience for snapping photos on the go, viewing your pictures is doubtlessly much better on a computer. Why not? Computers apparently have larger screens that increase image quality to another level. However, finding a specific photo in your desktop storage can be a daunting experience if your files are unorganized. Don’t worry. Listed below are some useful organization techniques that can help you a lot in this regard.
Add the Image Folders to the Photos Application
Many operating systems have a built-in Photos application to help you organize and view your pictures more efficiently. You may use it to organize your photos in separate folders and create a centralized hub for browsing.
Add Tags to Your Photos
Tagging your photos is a versatile way to categorize and organize them based on themes, events, or people. Most photo management applications allow you to add descriptive tags that make it easy to search the media files later. This is particularly useful for quickly locating pictures of specific occasions or individuals.
Keep Your Photos in Separate Folders
Make it a habit to create separate folders for different events, locations, or time periods. This organization method helps you maintain a clear structure for your photo collection. For example, you might have folders for vacations, family gatherings, or special occasions. Organizing photos this way simplifies navigation and ensures that each set of pictures is kept properly.
Rename Your Photo
Give your photos descriptive and unique filenames that reflect either their content or context. Organizing your files by their respective labels helps you find them easily instead of relying solely on visual cues. Consider including dates, locations, or key details in the filenames to make your photos easily identifiable.
NOTE: By incorporating these organization techniques, you can surely enjoy your memory collection on the larger canvas of your computer screen. Take advantage of these methods to transform your digital photo library into a well-ordered and easily accessible archive. Moreover, these are prerequisites for the tutorials on how to transfer photos from your phone to your laptop without USB.
How to Transfer Photos From Phone to Laptop Without USB in Easy Steps
Copying photos from smartphones to laptops has become significantly more straightforward today than in the past. In fact, the entire data migration process can be completed within a few minutes. No need to resort to advanced interventions and external assistance. Just choose a particular tutorial below on how to transfer photos from your phone to your laptop without USB. Initiate each step carefully and complete the procedure in no time. Check out the list below to get started.
Method 1: Transfer photos from phone to laptop using iCloud web
If you’re an Apple user, you can easily transfer photos from your phone to your computer via iCloud. Don’t worry. It’s a very simple data transfer procedure you can definitely complete with little to no effort. Here’s a short guide on how to transfer photos from your phone to your laptop without USB using iCloud.
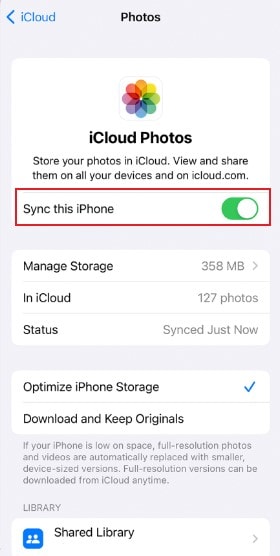
- Step 1: First and foremost, make sure that your iPhone is syncing your photos to iCloud. To check it, go to Settings > Apple ID > iCloud > Photos. Toggle on the radio button next to Sync This iPhone.
- Step 2: On your computer, launch the Browser.
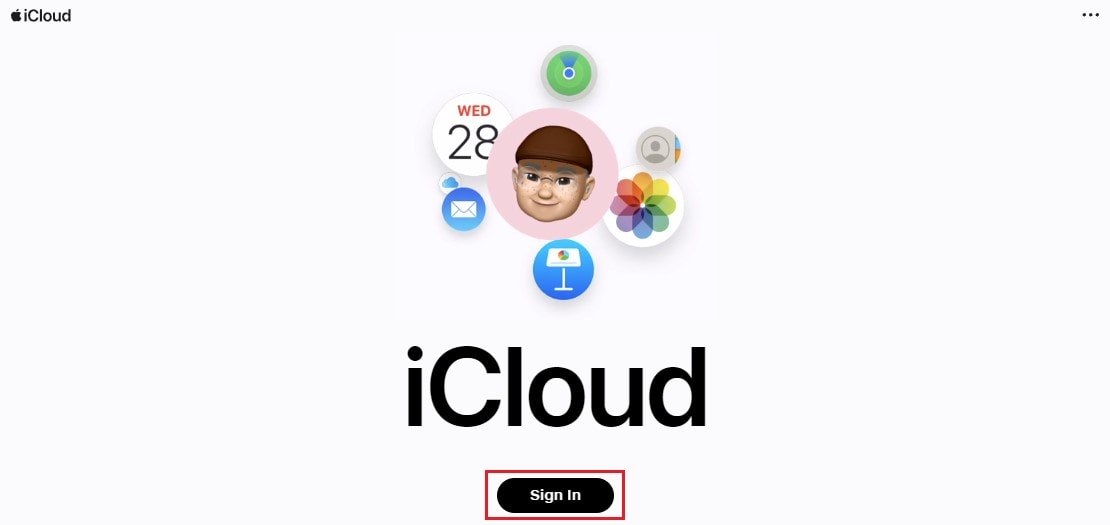
- Step 3: Visit icloud.com. Once it fully loads up, click Sign In. Log in to the Apple ID account you’re currently using on your iPhone.
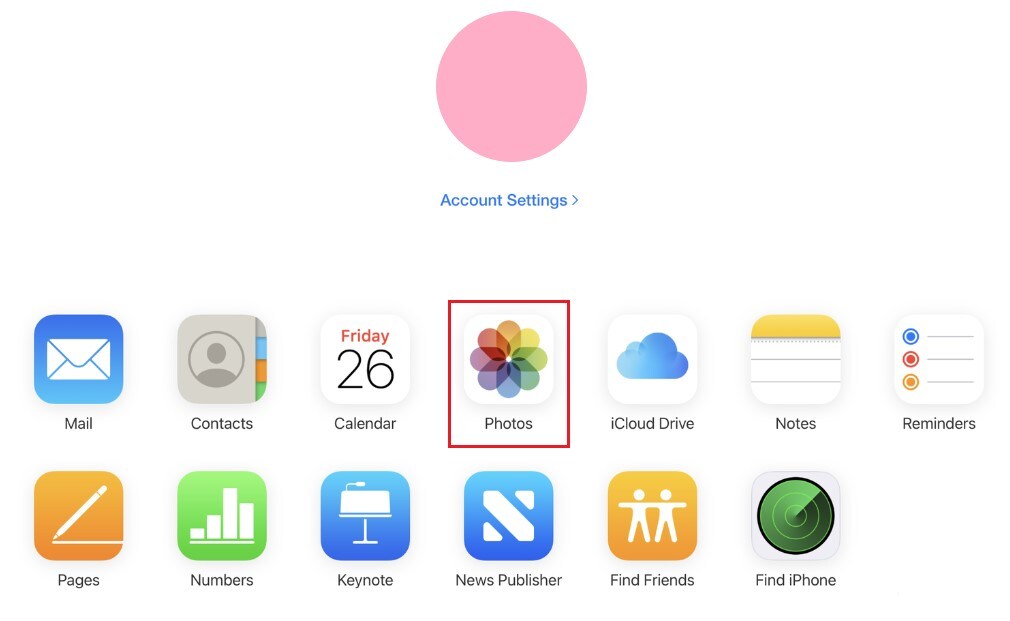
- Step 4: Click on the Photos icon.
- Step 5: Select the photos you want to transfer to your computer. After that, click the Download icon at the top-right corner of your screen.
NOTE: How to transfer videos from your phone to your laptop without USB? This data migration technique also works in this regard.
Method 2: Transfer photos from phone to laptop using Google Photos
Google Photos is simply the iCloud’s substitute for Android smartphone. Like iCloud, you can sync your Android photos to Google Photos and access them from your computer. Don’t worry. It’s very easy to facilitate. Here’s how to transfer photos from your phone to your laptop without USB using Google Photos.
- Step 1: Before anything else, back up your Android smartphone first to Google Photos. Go to Google Photos > Profile icon > Turn On Backup. Once enabled, Google Photos will copy your photos from the local storage to the Google server.
- Step 2: Launch the Browser on your computer. Go to google.com.
- Step 3: Click the Nine-dotted menu icon next to your profile. Make sure that you’re logged in to the same Gmail account you’re currently using on your smartphone.
- Step 4: Choose Photos.

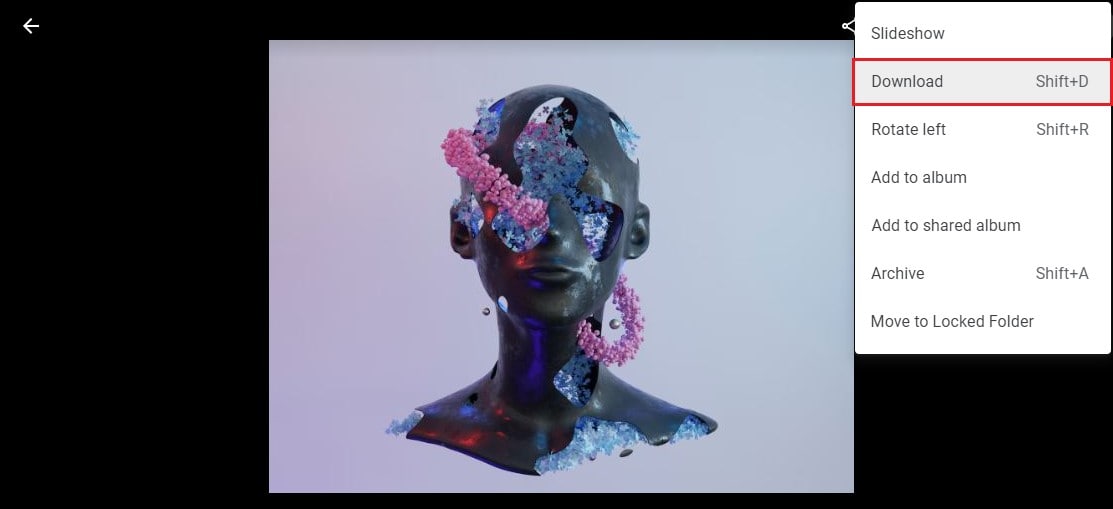
- Step 5: Click the images you want to save on your computer. From there, click the Three-dotted menu icon. Find and click Download or press SHIFT + D on your keyboard.
NOTE: How to transfer videos from your phone to your laptop without USB? This data migration technique also works in this regard.
Method 3: Transfer photos from phone to laptop using Bluetooth
Does your laptop have a Bluetooth connectivity feature? If so, try to use it for the photo transfer. Just connect your smartphone to the computer via Bluetooth and go ahead with the migration. Here’s a short guide on how to transfer photos from your phone to your laptop without USB via Bluetooth.
- Step 1: Turn on the Bluetooth connection on your smartphone and your computer.
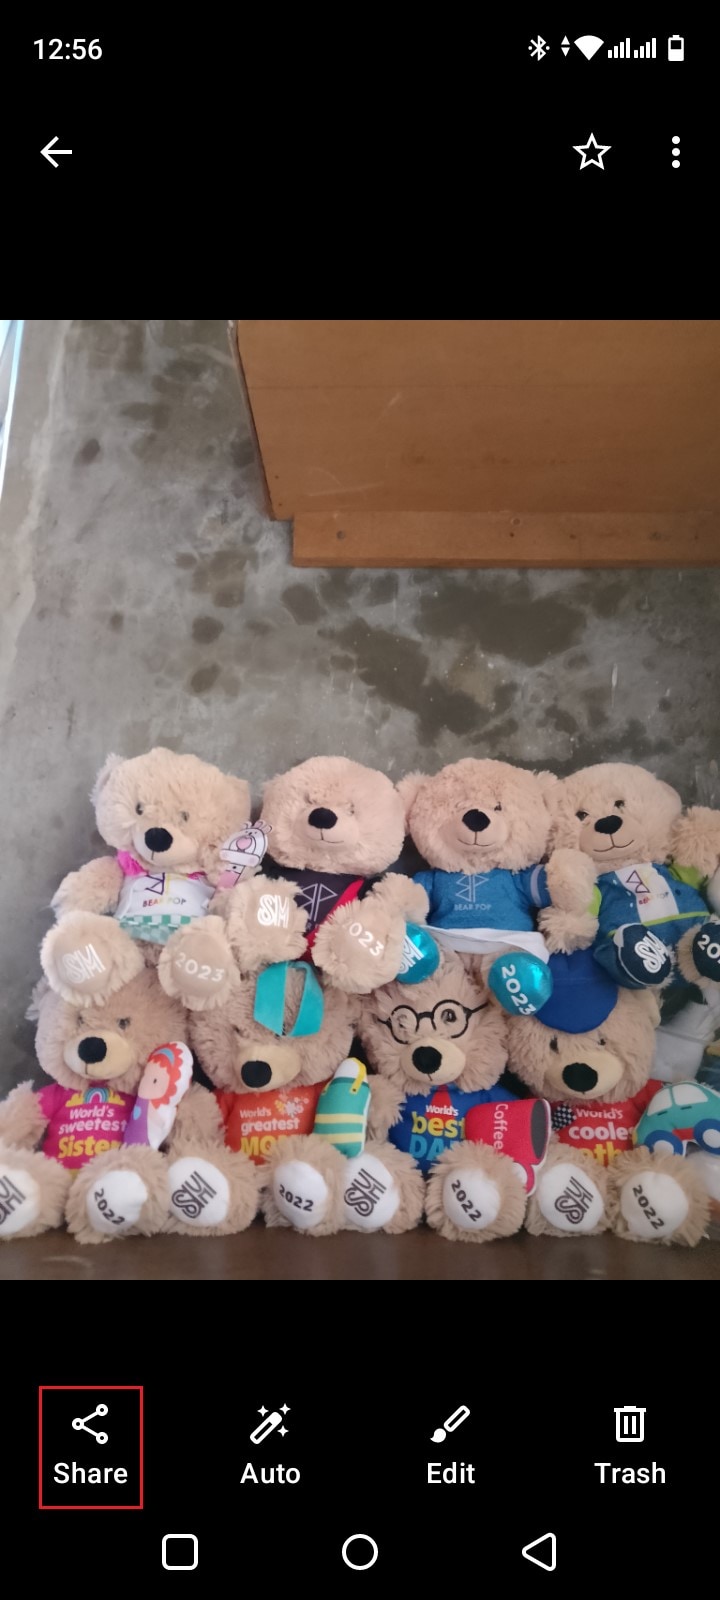
- Step 2: On your smartphone, select the photos you want to transfer. Click on it.
- Step 3: Click Share.
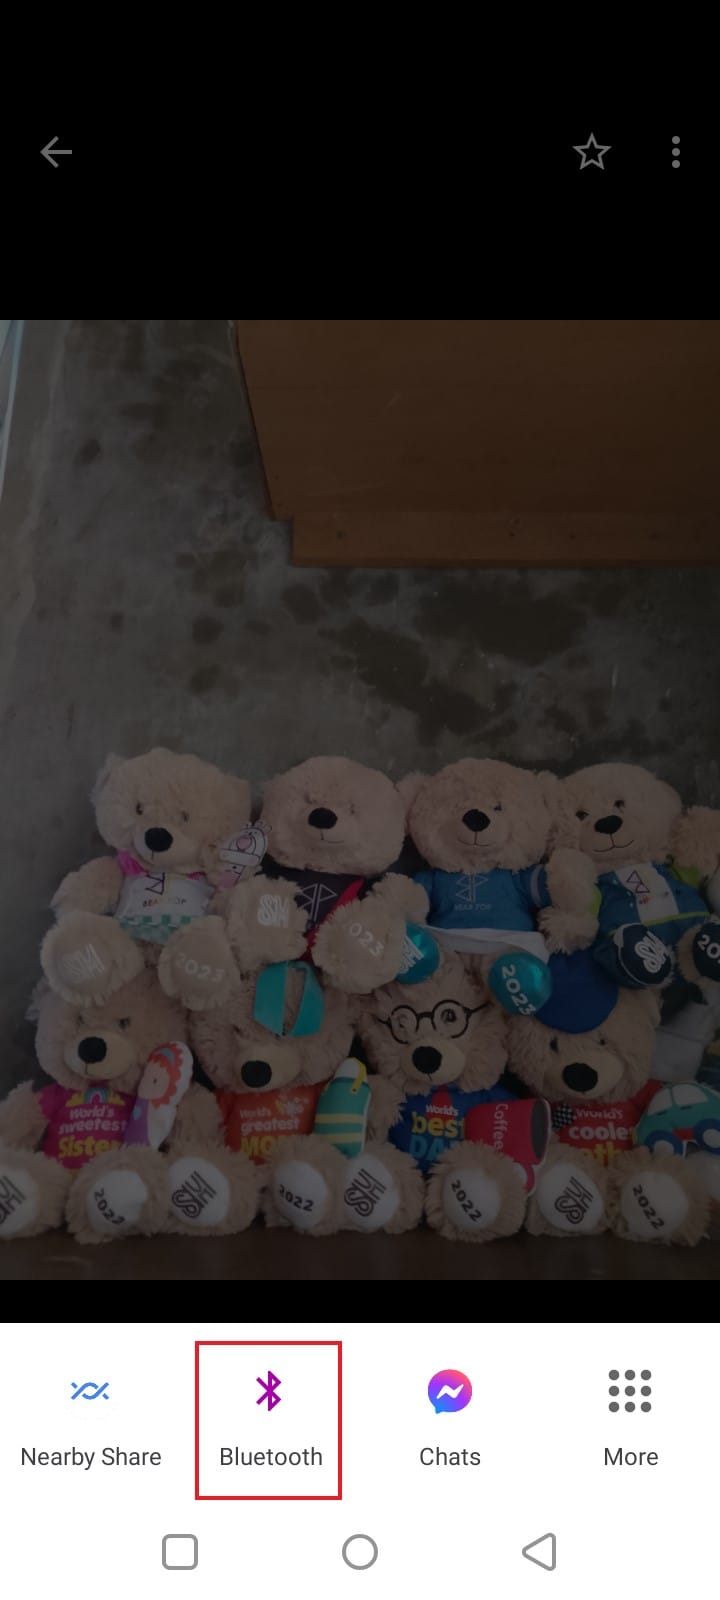
- Step 4: Click Bluetooth. Select your computer from the list. Then, click on it. Wait for the transfer to be completed in a few seconds.
Method 4: Email the photos from the phone to the laptop
If you’re only sending a few photos to your laptop, emailing them from your smartphone will certainly work great. Here’s how to transfer photos from your phone to your laptop without USB via email.
- Step 1: Launch the Gmail application on your smartphone. From there, click Compose.
- Step 2: Key in the recipient’s email address to the To field. Make sure that it is currently logged in to the browser on your computer.
- Step 3: Click the Attachment icon on the top-right corner of your screen. After that, choose the photos you want to transfer.
- Step 4: Click the Send button.
- Step 5: On your computer, launch the browser and sign in to the Gmail account delegated as the receiver of the transfer.
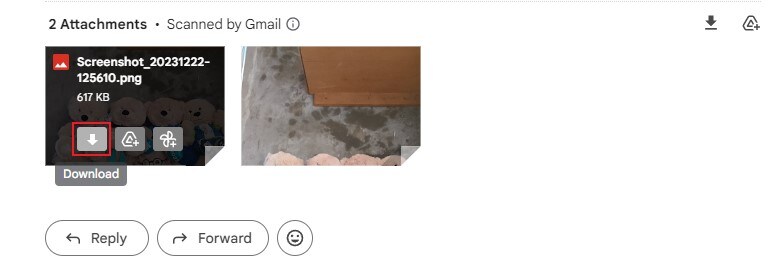
- Step 6: Find and click the Email to view them. From there, hover the mouse cursor over the photo attachment you want to download. Lastly, click the Download icon.
NOTE: How to copy files from your phone to your laptop without USB? This data migration technique also works in this regard.
Method 5: Transfer photos from phone to laptop using AirDrop
Are you using an iPhone and a Macbook? No problem. You may use AirDrop to move your photos between these two devices. Here’s a short guide on how to transfer photos from your phone to your computer without USB via AirDrop.
- Step 1: Activate AirDrop on your iPhone and Macbook.
- Step 2: On your iPhone, go to the Photos application.
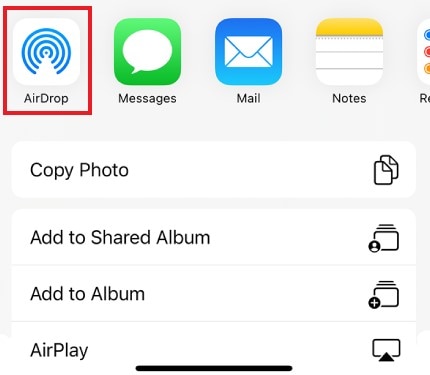
- Step 3: Choose the media files you want to transfer. After that, click the Share icon at the bottom-left corner of your screen.
- Step 4: Choose AirDrop.
- Step 5: Select your Macbook as the recipient.
- Step 6: On your Macbook, click Accept.
BONUS TIP: How to Copy Files From One Smartphone to Another?
As a bonus, it is important to know that transferring files from one device to another in a secure environment is significant. It safely copies the documents and lowers the risk of data loss and corruption.
With the holidays fast approaching and the abundance of noteworthy photos, videos, and moments coming your way, having a steadfast solution is crucial. This is where Wondershare brings a compact yet efficient tool to help you. Wondershare Dr.Fone lets you quickly transfer photos and files to another mobile device in no time. To back this up, here is a quick, comprehensive guide on how to do it in a few simple steps.
Suppose you’re upgrading to an IOS device and need a quick way to transfer files from your old Android device. Then here’s your go-to guide using Wondershare Dr.Fone.
- Step 1: Open Wondershare Dr.Fone on your computer and navigate to the Toolbox section. Select the Phone Transfer tool.
- Step 2: Once opened, set the Source and Destination devices for the data transfer. Use the Flip button to change the transfer direction between the Poco X5 devices.


- Step 3: Set the transfer direction from Poco X5 to iOS. Select the specific data types you want to transfer. Checkmark the desired items and click Start Transfer.

- Step 4: A new window will show the progress of the transfer. If you want to stop the operation, click Cancel.

- Step 5: Once completed, click OK to close the window.


Conclusion
Navigating the digital landscape of photo organization and transfer has become increasingly vital in our fast-paced era. This article showcased various wireless methods, from iCloud to Bluetooth, and offered a step-by-step guide on how to transfer photos from phone to laptop without USB cables. As a valuable bonus, Wondershare Dr.Fone emerges as a trustworthy solution for efficiently transferring photos and files between mobile devices, ensuring a hassle-free experience. As we approach the holiday season, where memories are plentiful, having a reliable tool like Wondershare Dr.Fone can enhance the management of our digital archives, making it easier to cherish and share moments with friends and family.

How to Transfer Data from Poco X5 to BlackBerry
Today’s world is full of technological benefits. Transferring data from one part of the world to another can be done in the blink of an eye. Transferring data from one phone to another should be that simple right? Well, it is if you are using devices with the same OS. But, what should you do if you want to transfer data from, let’s say, Android to BlackBerry? Don’t worry. It is possible, and we will guide you step by step through the entire process.
Option 1: Issues about transferring data from Poco X5 to BlackBerry
When transferring data from Poco X5 to BlackBerry, you can’t use Bluetooth or a third party software that will help you speed up the process. And unfortunately, you will sometimes wish that you can speed up this process. You can try to manually transfer data from Poco X5 to a computer, and then from a computer to BlackBerry, but this process can take hours. It is boring to transfer the files from one place to another, and the time it takes is a real pain in the neck. And also, it is impossible to transfer apps from Poco X5 to BlackBerry because of different operating systems. Sometimes, not even all photos, videos and music files will be compatible. But, luckily, the BlackBerry developers have thought of a one way, which is simpler than the manual transfer mentioned above, to transfer your data from Poco X5 to BlackBerry. It takes less time, but you still need to do some work.
Part 2: How to transfer data from Poco X5 to Blackberry (Free)
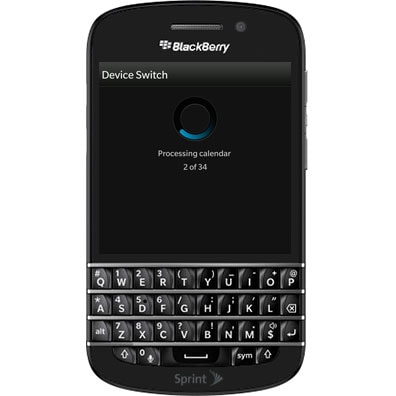
The BlackBerry developers have thought of an app that will help you transfer your contacts, calendar videos and photos from and Android device to a BlackBerry. You will not need to connect the Poco X5 devices to a PC or Mac. You will only need to connect both devices to the same Wi-Fi network. The app is called Device Switch.
From the Home screen of your BlackBerry tap the ‘BlackBerry World’.

Then, tap the search box and enter ‘Device Switch’. After the Poco X5 device shows up, tap it.

Then, you should be able to see the ‘Download’ button on the right side. Tap it, and wait for the app to download. You may be prompted to enter the login information for your BlackBerry ID account.

Once the download is done, ‘Open’ button will appear. Tap it.

You should read through the top half of the screen, and make sure that the preferred options are checked. Once you finish reading, click ‘OK’.

After pressing OK, swipe left. A new screen will show up. You will have the option to choose the Poco X5 device you are switching data from. Make sure to click Android.

Then, download the Poco X5 device Switch application from Google Play on your Poco X5. When the application is installed, open it, tap next and then RIM BlackBerry Device. Note the PIN code and enter it on your BlackBerry when prompted.

Make sure that the preferred sync options are checked on the Android device and then tap ‘Next.’ These two devices will establish a connection using the same Wi-Fi network. Once that happens, the transfer process will begin. The process may take a while. It depends on the amount of data which is being moved.
Once the transfer is done, tap finish. And that is it! The content from the Android device was successfully transferred to your BlackBerry device.

The Device Switch app is very reliable. But, there is one downside. You cannot transfer all file types using it, and the process may take a lot of time sometimes. But, we have found an even easier way. It is software called Dr.Fone - Phone Transfer. Keep reading to find out more about it!
Part 3: Transfer data from Poco X5 to Blackberry by Dr.Fone (Fast, easy and safe)
Dr.Fone - Phone Transfer can transfer all kinds of data including text messages, call logs, contacts, and of course, photos, videos and music. The software does not only enable transfer between Android, iOS and Symbian, but also restores data from iTunes, iCloud, kies and BlackBerry backup files. It supports more than 3000 phones currently, from all manufacturers.
Dr.Fone - Phone Transfer
How to Transfer Data from Poco X5 to BlackBerry With 1-Click
- Transfer all contacts, music, video and music, from Poco X5 to BlackBerry.
- Enable to transfer from HTC, Samsung, Nokia, Motorola and more to iPhone 15/14/13/12/11/X.
- Works perfectly with Apple, Samsung, HTC, LG, Sony, Google, HUAWEI, Motorola, ZTE, Nokia and more smartphones and tablets.
- Fully compatible with major providers like AT&T, Verizon, Sprint and T-Mobile.
- Fully compatible with iOS 17 and Android 13.
- Fully compatible with Windows 10 and Mac 14.
3,975,690 people have downloaded it
Steps to transfer data from Android phone to BlackBerry by Dr.Fone
Step 1: In order to transfer data from Android phone to BlackBerry, you are supposed to download and install Dr.Fone fisrt. And then launch Mobiletrans and select the “Phone Transfer” mode.
Step 2: Connect both your Poco X5 and BlackBerry phone to your computer. On the window below, you can click the “Flip” button on the program in order to switch the destination and source phones, please make sure that the BlackBerry phone is the destination. Then you can select the contents you’d like to transfer.

Step 3: After you select the transfer contents, just click “Start Transfer”. Then the program MobileTrans will start to transfer data from Poco X5 to BlackBerry. After a few minutes, the process will finish.

- Title: In 2024, How to Migrate Android Data From Poco X5 to New Android Phone? | Dr.fone
- Author: Emma
- Created at : 2024-07-17 23:24:37
- Updated at : 2024-07-18 23:24:37
- Link: https://android-transfer.techidaily.com/in-2024-how-to-migrate-android-data-from-poco-x5-to-new-android-phone-drfone-by-drfone-transfer-from-android-transfer-from-android/
- License: This work is licensed under CC BY-NC-SA 4.0.